I have finally submitted the required NHTSA complaint regarding the digital dash in our 2019 Dutch Star.
The issue I am filing is in regards to the brightness while driving. Freightliner needs to offer the ability to dim the dash even further than it is now, and to change the background to a night friendly color scheme (aka: Dark Mode).
I do not know if this issue exists on Spartan digital dashes.
I encourage anyone else that has this problem to file the complaint on the NHTSA website
https://www-odi.nhtsa.dot.gov/VehicleComplaint/
In addition, you should send an email to Newmar and Freightliner documenting your case. It is my hope that we can work together as a community to bring an important change to this very dangerous display.
I have tried the 2 stop film cover, and this does help. A spare jacket or blanket helps too. Neither of these options are acceptable.
Freightliner Email: fcccservice@daimler.com
Once you have submitted your complaint to NHTSA, you will receive a issue number for tracking purposes. If we can get several of these in this week, it will trigger a faster investigation process.
For the purpose of the report, I used my last drive at night to document. It happens every time, but the report is going to ask for a single incident.
All posts by redbaron73
2019 Newmar Dutch Star – Paint Correction & Ceramic Coating
Newmar performs a cut and buff paint finish on all Dutch star and higher coaches. The problem with their process is the quality is not consistent.
My rv had a terrible cut and buff job. Every panel and every color had terrible swirl Marks. These are only visible with direct light, but when they show, it looks terrible.
I have a crew out working on the paint correction, and then will be applying CeramicPro PH9 to the rv in multiple coats.
I am not exaggerating when I say the entire coach looked like the pictures shown.
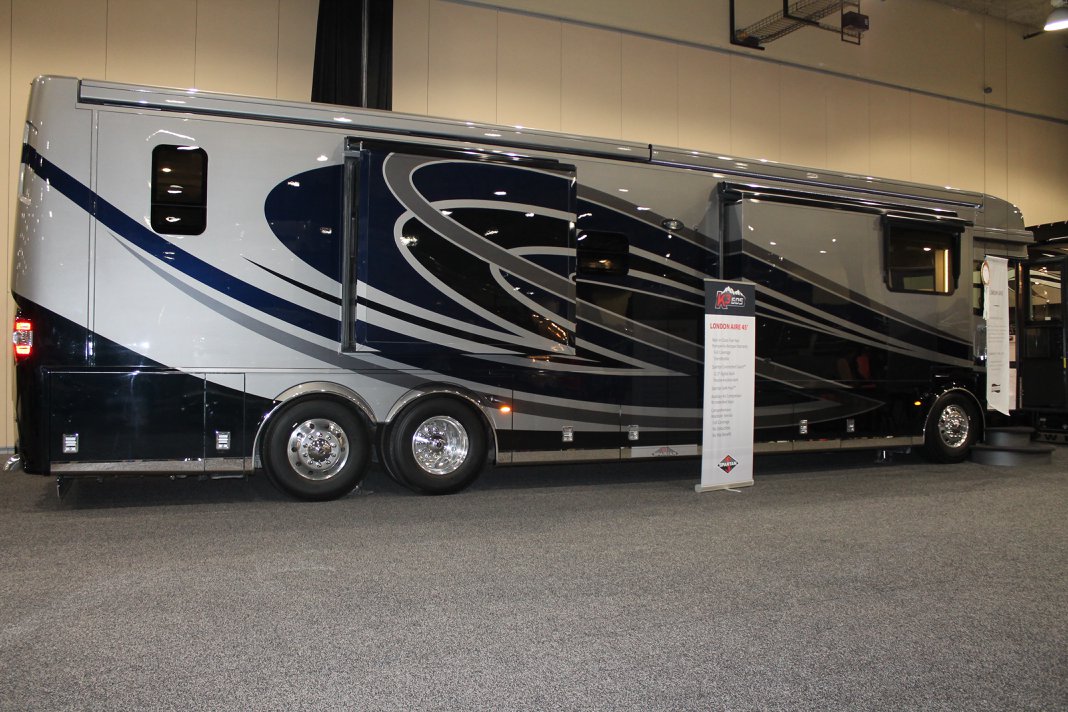
This is a direct result of the soft clearcoat and the rushed polish process. While at camp newmar, I saw a brand new 2019 king aire, and it was just as bad.
Newmar has too many unskilled laborers working in the paint process. I know they have some really good people there too, and I am sure that they are frustrated.
I also question the Newmar wash method. They do not have a 2 bucket rinse or a grit guard, they just grab the lambs wool and wash. The lambs wool becomes contaminated during the wash of a single coach.
Swirl Marks are in most factory paint jobs to some degree. Both of my BMW’S have factory swirl Marks. Once you see the swirls, you will never unsee them.
You have to get the angle just right in direct light to find them. Some will look like spider web, others are circular. The circular is from using the wrong tool to polish. Spider web could be from washing or the plastic protector they use when shipping. Most dealerships cannot repair this.
This is not a new problem, but it is the reason why Newmars cut and buff was a separator in the industry.
Once they brought the process to the Dutch Star, it became less valuable. They produce too many to do it properly.
I have never seen a description of what they do for cut and buff, and how many layers, not what their tolerance for imperfections per square inch is. I have to assume this process is nothing like the King Aire was in 2013.
Today’s King Aire does not look as good as they used to, but they can all be saved with paint correction.
I guarantee every motorhome has the issues I have shown. If you question it, you need to look at it from many angles with the sun on it, and at different distances.
Once you see it, you will never unsee it. Similar to the Jesus wood carving that traces the opposite of the letters. Hard to see at first.
I am a perfectionist when it comes to paint detail. I didn’t save my 2013 in time, and don’t want to live with a coach for 5 years that has these swirls.
Girard Nova Awning Protection Switch
There have been numerous reports of the Girard Nova Awnings deploying on their own. I have never experienced this in the limited time I have owned my 2019 Newmar Dutch Star, but I did receive a call from Newmar specifically advising me to leave the awnings unplugged unless I intend to use them.
The location of the plug is in the bays, and although not hard to access, it is an extra unnecessary step and an inconvenience to have to unplug each time.
The reasons for the deployment given where a possible grounding issue, which has yet to be identified. Since I park my RV in a garage, this could be a real problem if the awnings deployed.
The Girard Nova awning has a Emergency break cutout circuit, that is supposed to retract the slides once the break is released and then after 60 seconds will remove all power to awnings to ensure the awnings will not deploy. In spite of this circuit, numerous claims of awning deployments while driving have been made online, and Newmar has confirmed several warranty repairs for this exact problem. I do not have data as to what years are affected, nor how many models.
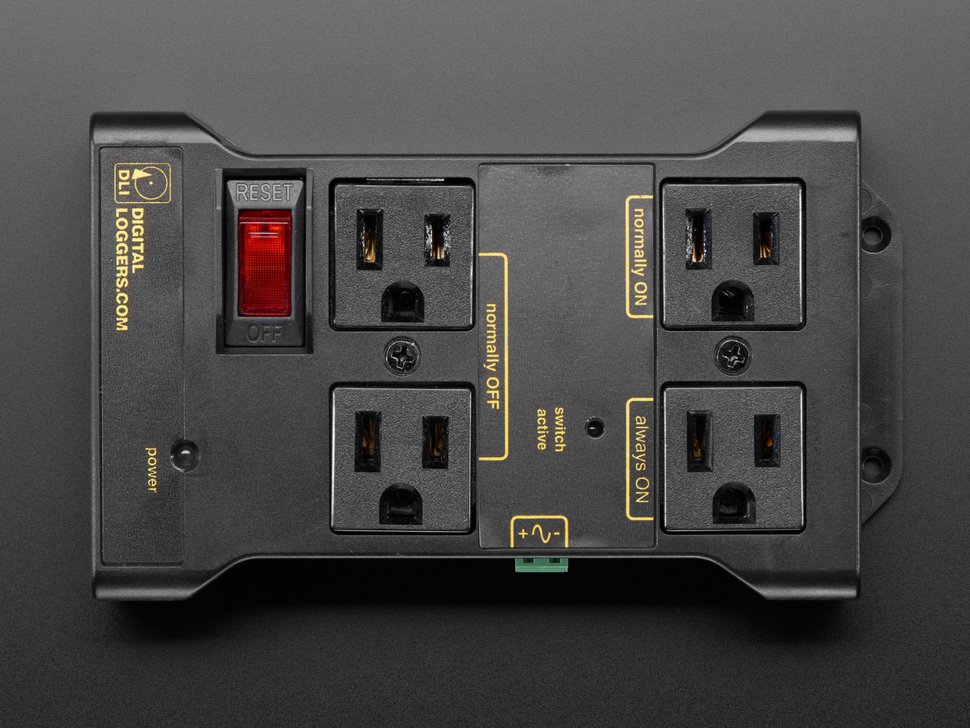
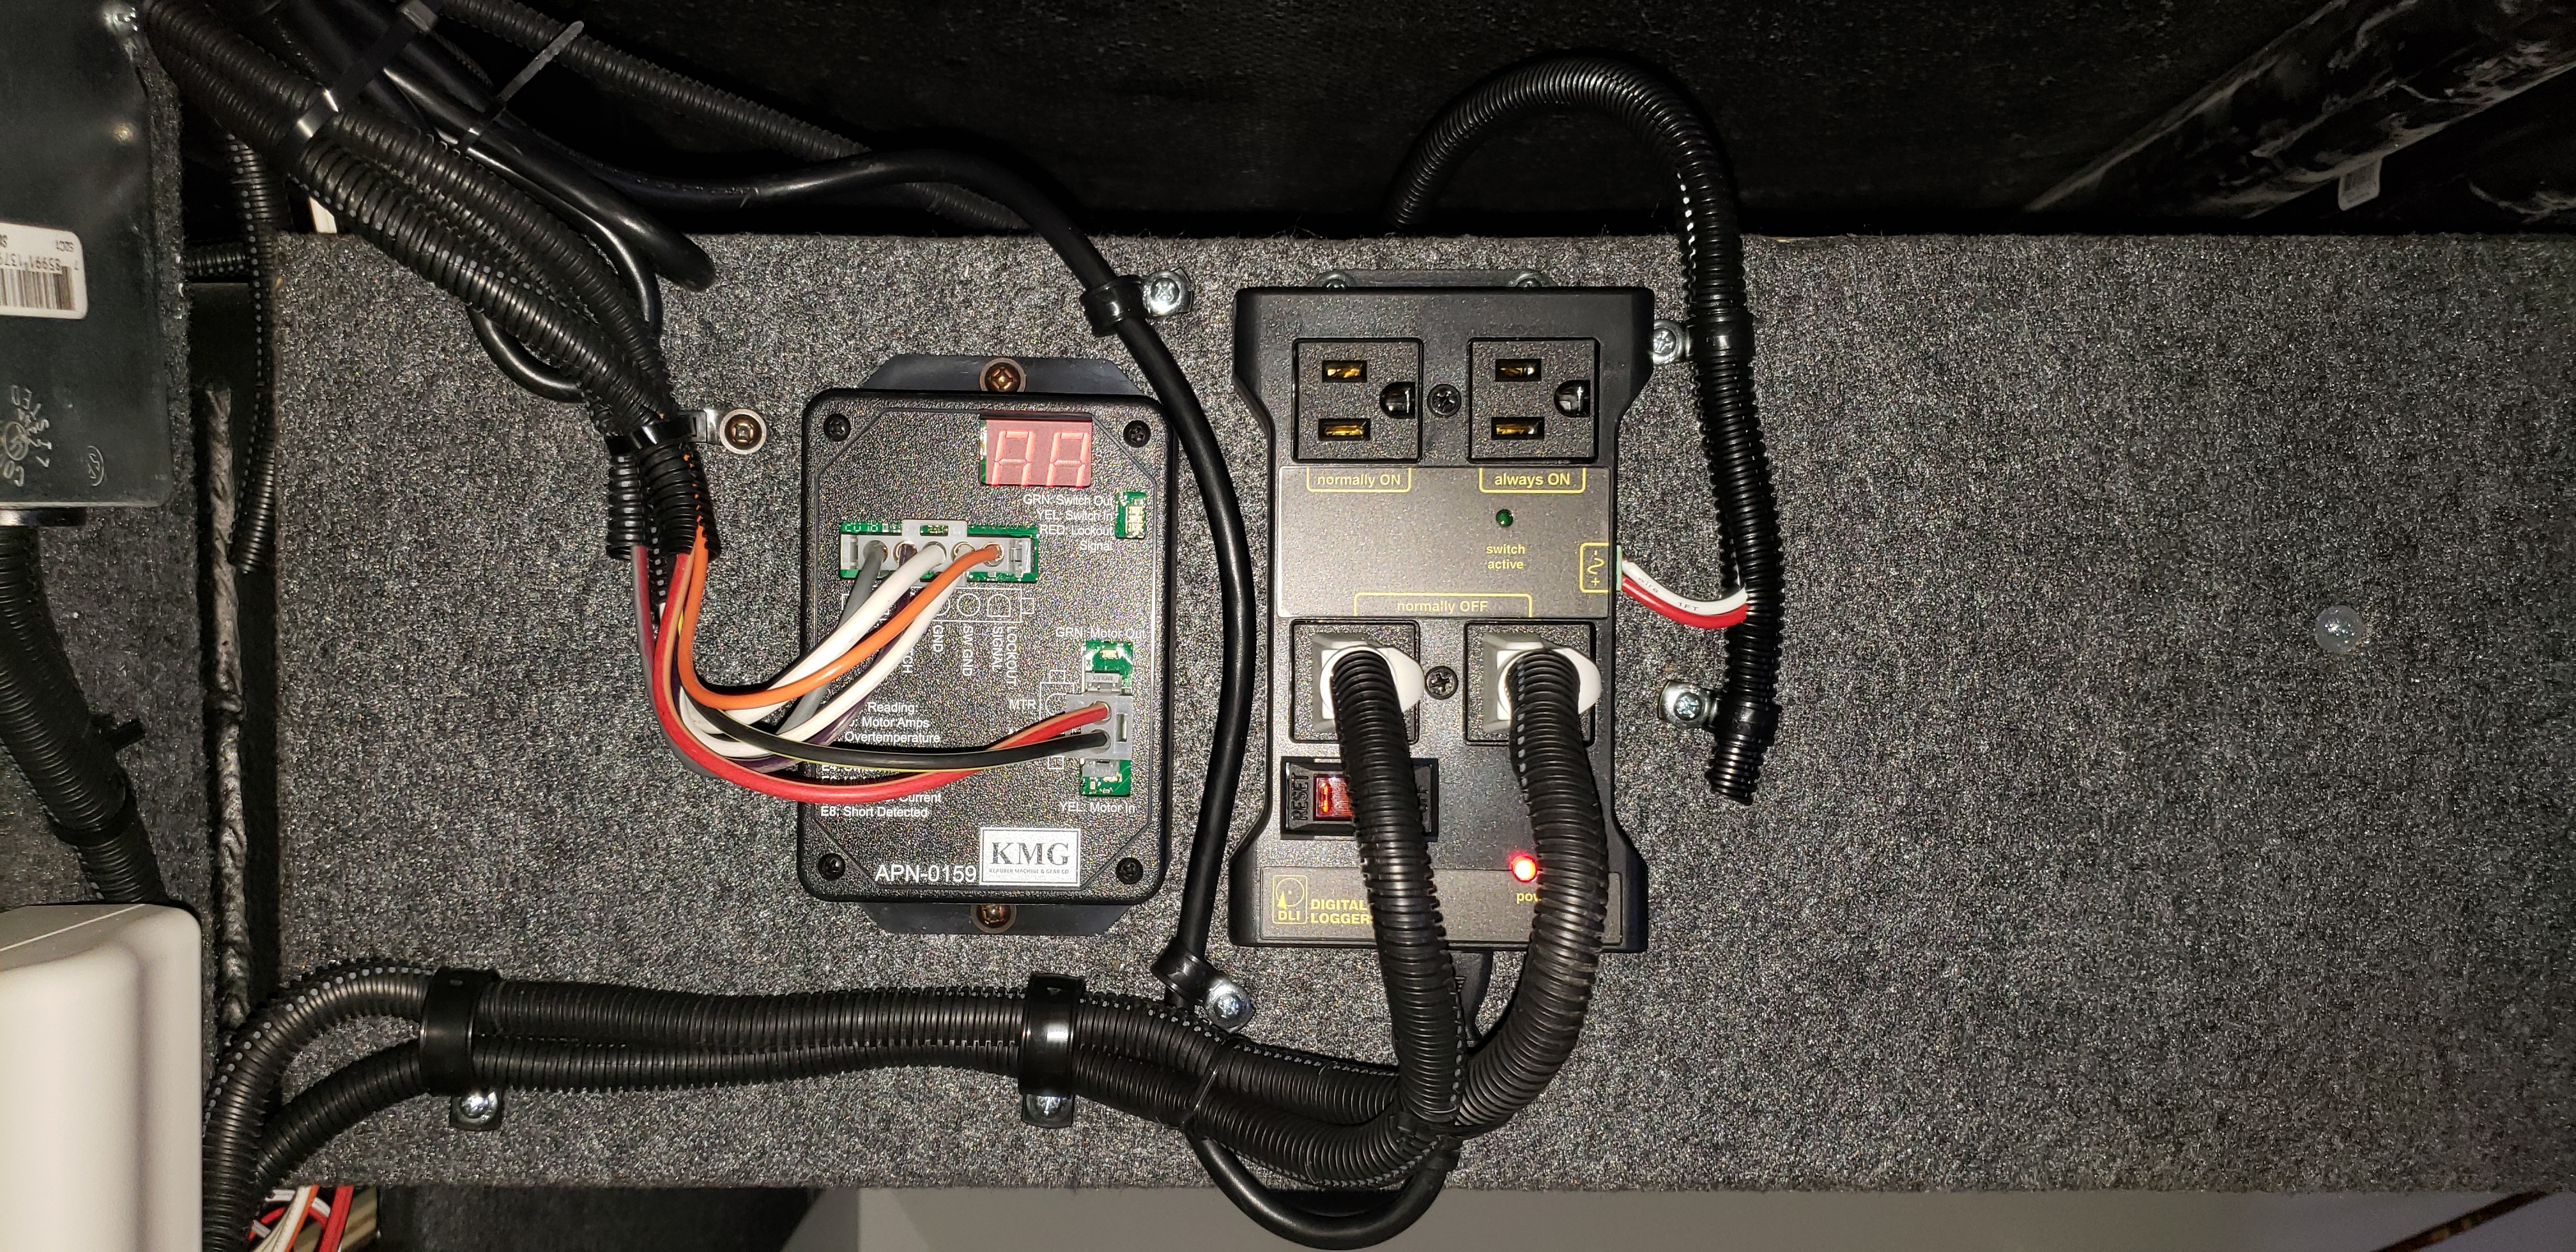
My goal is to make certain that the awnings cannot deploy, and since Newmar has stated the only way to do this is to remove power, I decided to go along with that plan, but in an easy fashion. What I have installed is a relay controlled power strip.

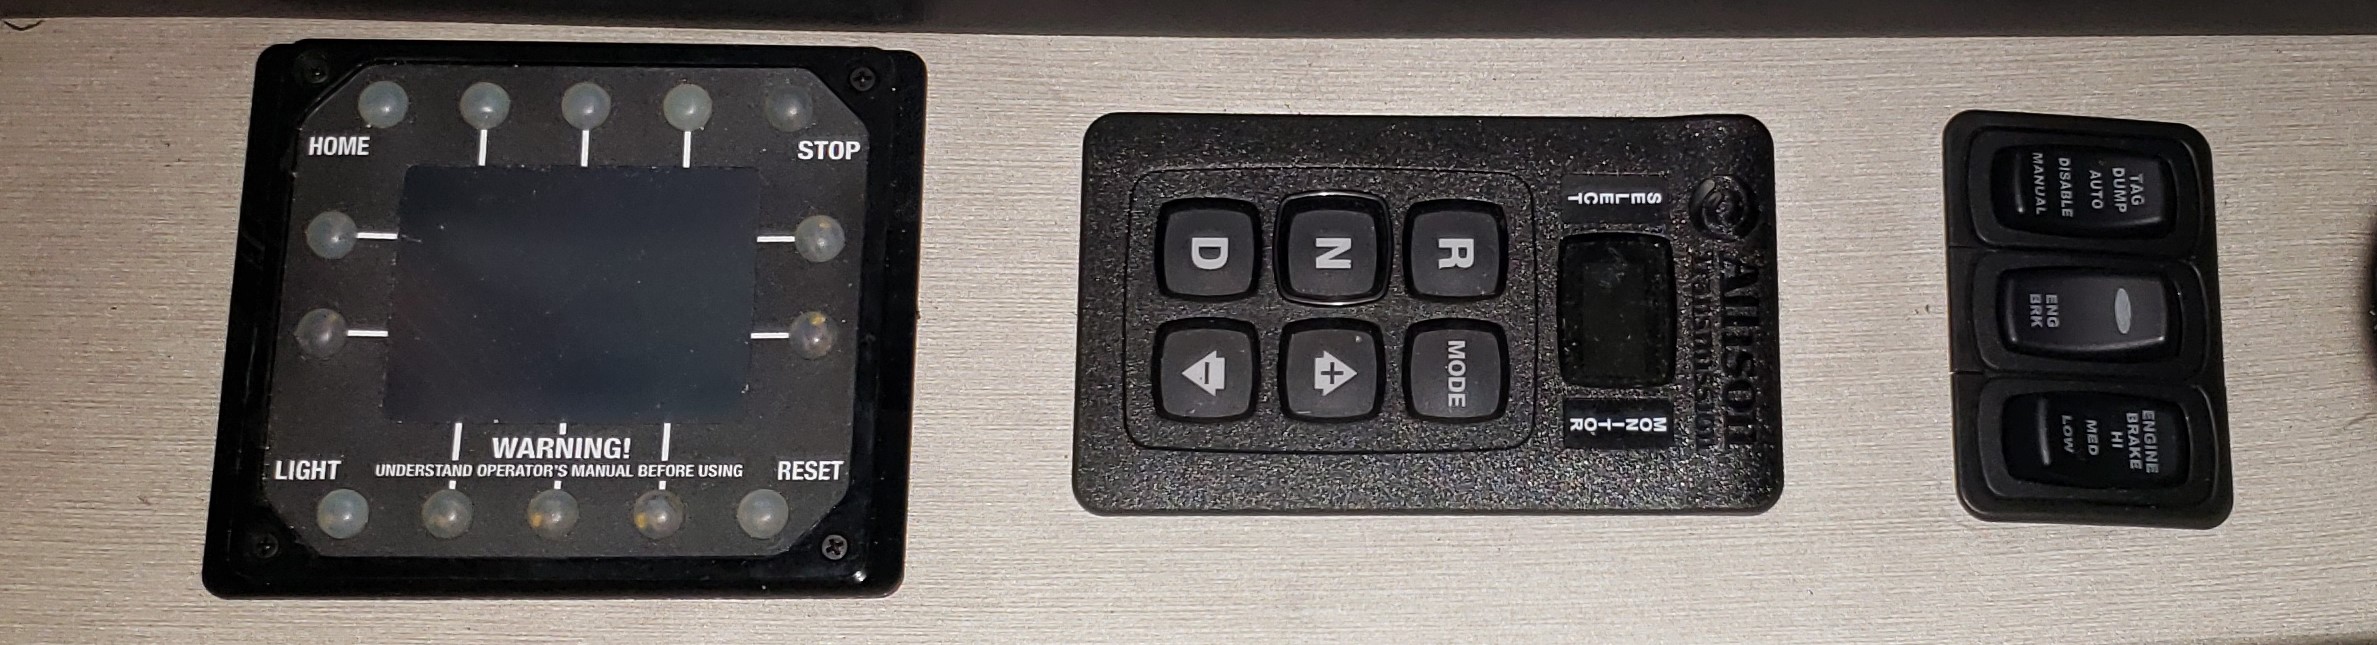
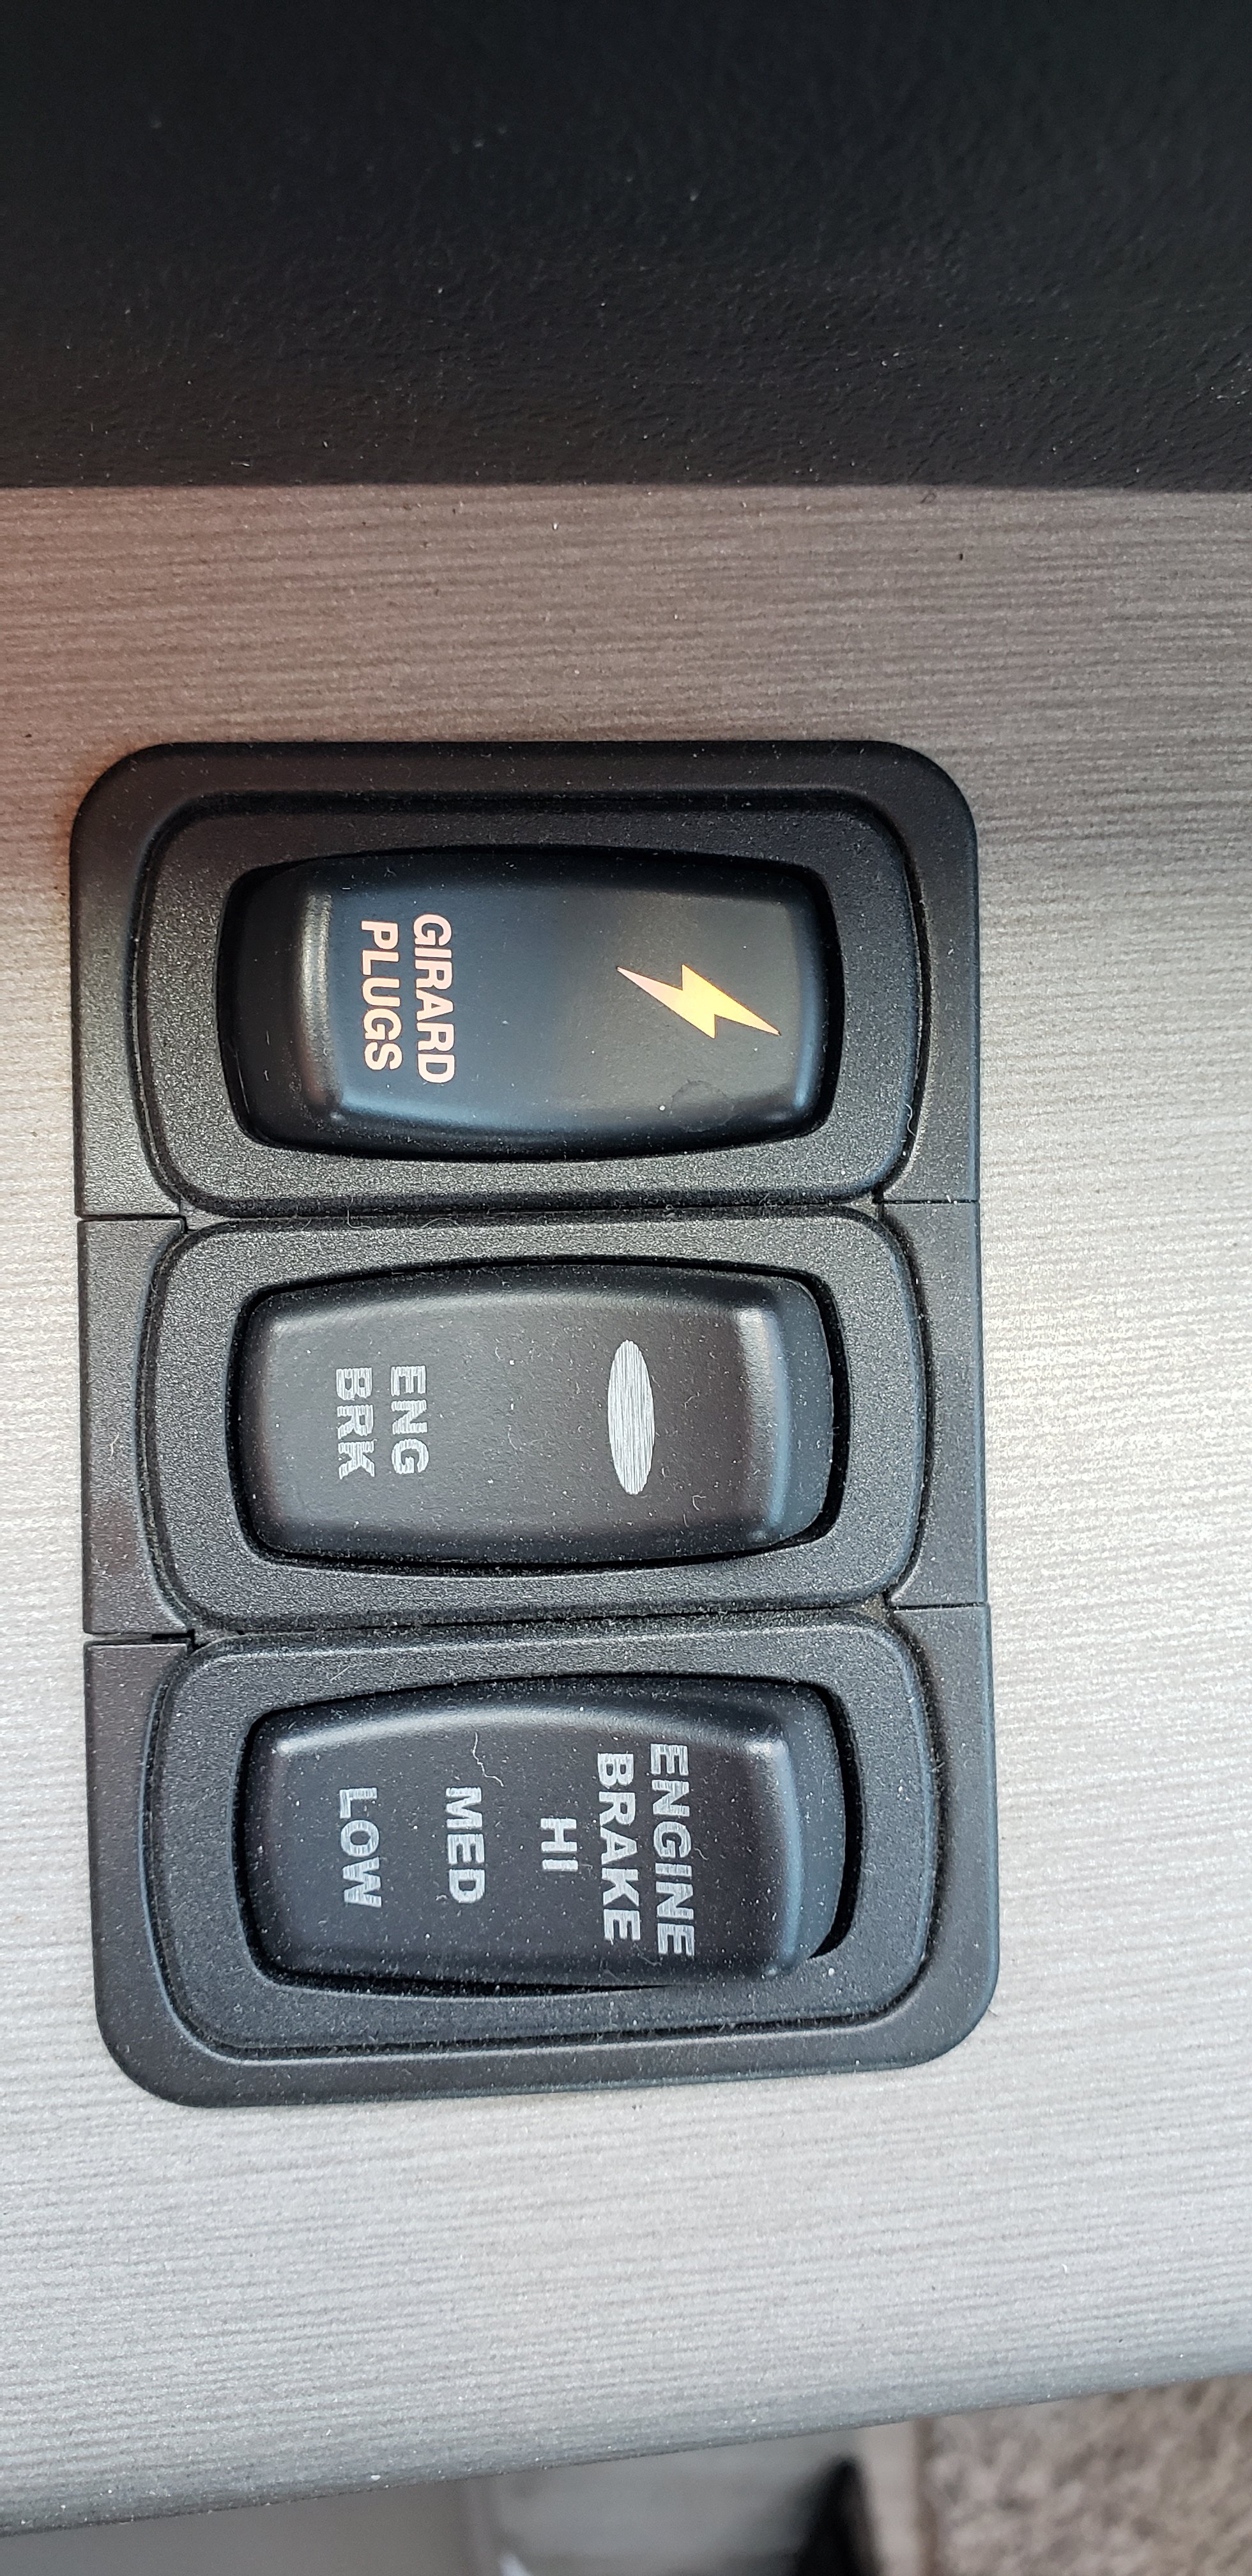
The plugs will only be turned on when my switch passes 12 volt DC power to the relay. This was accomplished with minimal effort and cost, and restores the luxury of using the awnings safely and conveniently. The switch is located on my left hand side console, in front of my transmission. Not an ideal place, but this was an unused switch for the tag dump, which was replaced with a function on my HWH Active Air. By using this location, I didn’t have to cut into the dashboard, or do extensive work. I will most likely relocate the window up/down button to this position once I receive the custom switch I have on order. For now, I am using the Tag Dump switch, rewired to only make use of the ON/OFF and not connecting to the momentary (ON).
The parts list for this project:
- Controllable Four Outlet Power Relay
- Custom Made wiring Harness
- Custom L-Series switch
- Power Distribution Box
- 16 Gauge Wire
- 12 Gauge Wire
- 10 Gauge Wire
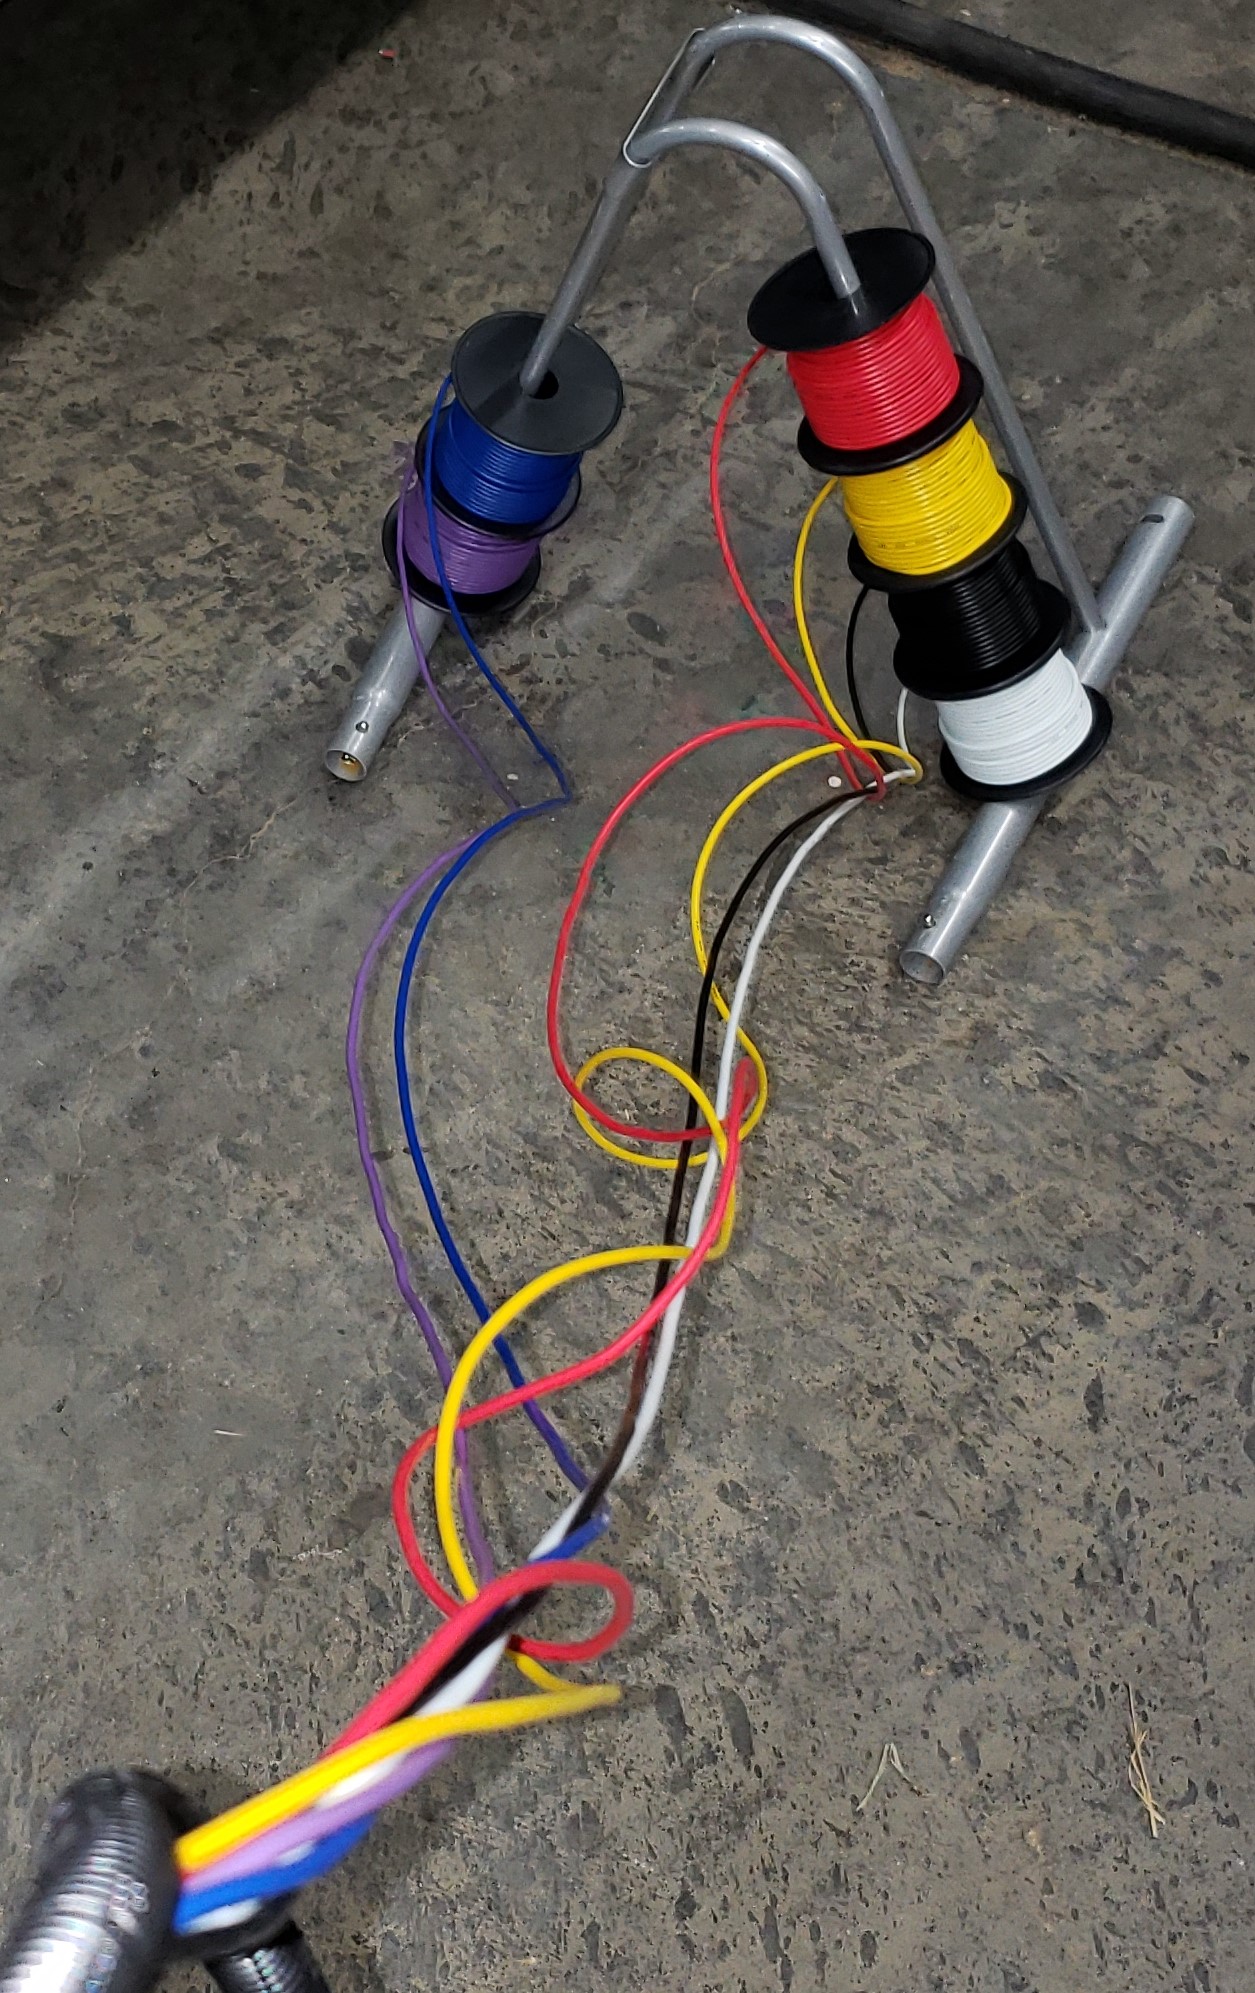
For the custom wiring harness, all that is required is a single 16awg signal wire running to the switch. Since this is a long run going from the bays to the dashboard, I decided to make a custom wiring harness with extra wires for the future. I included 6 different colors of wires in a wire loom, and ran it inside the frame rails to the front of the RV. I then entered the wiring compartment below the drivers seat, and ran it up to the dashboard. This harness is now fully accessible for any future projects.
Making the harness was rather simple, but time consuming. My hands were rather sore after putting all that wire inside the loom. I ended up with a 30 foot harness, which can easily reach the cabinet above the driver, or the center console behind the screens. I also left a pull string in the chase for future wire installation. After taking the time to fish the first wire, it is always wise to leave a pull string behind.
Since I was already running wire from the 12v power bay to the dashboard, I made a secondary harness with 3 10 awg wires (Red/Black/White) and connected to the KIB terminals. These terminate behind my dash into two distribution boxes, one for ignition power, and one for constant power. I will use this to tap in for my Dash Camera, Tablet Power, and other accessory power items in the future.
With the power distribution in place, the switch needs to have a 12v power supplied to one leg, and the positive signal wire connected to the other, so that when the switch is ON, 12v DC power is supplied to the signal wire. I used a common ground for the Negative side of the signal wire. The finished product allows me to now safely cut the power to the Girard awnings with a simple toggle switch, and I no longer have to disconnect and reconnect the power cords.
Update:
I originally used the tag dump switch, but have since replaced that switch with a custom switch. This is illuminated when it has power, so it is easy to see that it is energized.

Newmar Engine Preheat installation

The ITR Heat Oasis CH50 is a diesel hydronic heating system that is pre-installed in the 2019 Dutch Star. This provides for domestic hot water, and furnace heating for the whole RV and basement. The oasis is powered by either the diesel burner, or by electrical providing either 5k or 10k BTU. Engine waste heat is also used to provide heat energy to the distribution module, allowing for all system functions while driving without the use of additional heat sources.
All units are pre-wired for the engine loop pump. The panel will have to be replaced with one that provides the Engine Preheat Pump switch, and the pump will have to be installed inline.
I opted to go with the ITRTouch Remote because I liked the look and it provided the function for preheat. When replacing an existing switch, you will need to order the over sized ITRTouch remote to cover the hole used by the original, which is taller and slightly more narrow than the new one. You can use the new ITRTouch without the pre-heat option. If you want to play with a demo of this switch, ITR has one on their website located here.
The new remote is 1/4″ wider than the standard switch. Once the hole is the proper size, the wiring harness will connect to this switch as a direct replacement. The pump was $295, and the new remote was $260.00 before any applicable discounts.
To perform the installation of the pump, you will need several items:
- 4 inches of 3/4″ ID heater hose
- Qty. 2 – 3/4″ hose clamps
- Qty. 2 – Hose pinch off pliers
- A dozen or so absorbent shop towels
- Qty 1 each – 16 gauge Fully insulated spade Connector Male/Female
When I started the install, I only had 2 sets of hose pinch pliers, and they were too bulky to properly close the hose in the cramped area. I ended up spilling about 2-3 cups of fluid before I gave up and reconnected the hose. I then researched what I could get delivered in 1 day from Amazon, and found these clamp pliers. What I liked about this style is that they are not vice-grip style, using a ratchet style system instead.
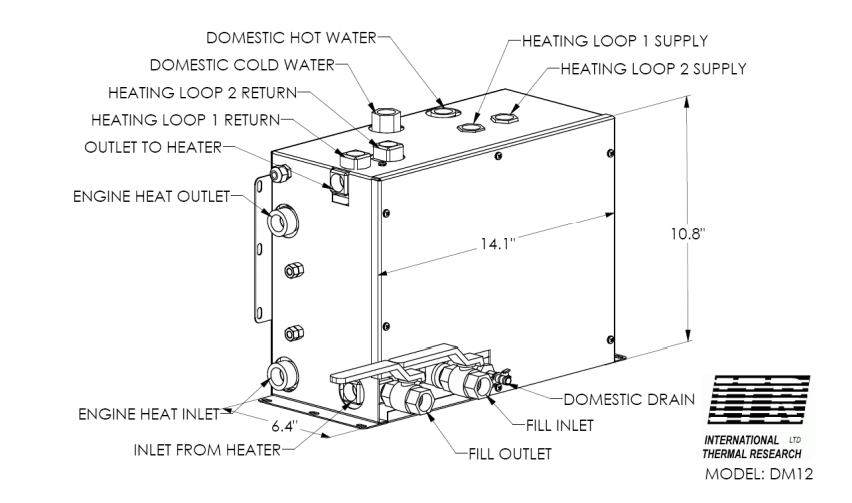
Newmar places the DM12 distribution panel behind a wall in the bay just behind the pass thru bay. Removing the wall will expose the DM12, and provide you with access to perform the full installation. Looking at the graphic for the DM12, you will see that the left side is where the engine coolant inlet and outlets are located. The pre-heat pump is installed on the outlet side, with the pump oriented to return the coolant to the engine.
Place 1 clamp on the inlet side, about 3 inches above the clamp, and another on the outlet side, about 6 inches from the clamp. I used a 3rd clamp and clamped the line higher up at the frame rails. This allowed me to capture the fluid in the line in a controlled manner, and have more flexibility with working with the hose.
Once the outlet is disconnected, place the pump in the final position and connect the engine side to the pump. There is not enough room to connect the pump and then re-position it to the back wall. The other hoses will not allow for the pump to fit through. Also pay close attention to the routing of the return hose, ensuring that it will not rub or kink. I had to alter how it routed from the frame rail down to get a proper alignment. I personally did not have the proper tools for easily handling the continuous pressure clamp, so I removed this and replaced with a worm-gear hose clamp.
Install the 4″ of 3/4″ heater hose to the outlet side of the DM12 and connect to the pump.
Secure the pump to the back wall, but use caution on the screws length,as the other side is where all of the 12v electrical connections are located.
The electrical needs to be connected to the pump using the spade connectors. The wires are red and black, and are exiting the DM12 above the outlet connector. They will be crimped together for protection. When doing the final routing of the electrical, make sure it does not rest along the heater.
After cleanup of any spilled fluids, place clean white towels around all connections that have been replaced, and run the engine for 30 seconds. Verify that your towels remain clean white, and that there is no leak.
Next, bring the ITR up to running temp and turn on the pre-heat option. Verify the pump is operating.
Since I had spilled so much fluid, I was worried about the air in the lines, and the loss of fluid. I ran the pre-heat pump for several hours, which was overkill, and then topped off the reservoir with coolant.
The final step was to take a test drive and bring the engine up to operational temps and let it remain for 30 minutes. This was about an hour total of driving. After that, I was satisfied that there would be no leaks, and closed it up.
For a view of the Remote Control operation of the Oasis, view this video.
For a view of the final pump installation and commentary, view this video.
2019 Dutch Star 4369 – HWH Active Air
When I purchased my 2013 Dutch star, one of the first upgrades I did was install HWH Active Air. This system allows for air leveling of the coach, while retaining the factory hydraulic leveling options. When driving, Active air works proactively to maintain levels of the coach, preventing the lean that occurs when making lane changes, or radius exits.
HWH does the installs at their factory in Moscow, IA. The job is a 5 day job, always starting on Monday and work being complete early Friday. All of the components are manufactured onsite, and custom fit to the coach.

The active air is very noticeable under some extreme test conditions that I did, but the weather was not bad, so I didn’t have a very many times when the Active Air went into fly mode.
Fly mode is when the screen goes to green, and is actively adjusting the level of the coach to counteract conditions. When driving with a strong cross wind, or having a semi meet you on a 2 lane road at 80mph, the Active Air will usually go into fly mode.
I was able to make it go into fly mode by cranking the wheel hard right to left, trying to get the back end to break loose. I also did a sudden 3 lane change (no traffic around me) and quick return 1 lane over, which would normally cause a lot of body roll, but the coach handled great.
2019 DSDP 4369 – Factory Delivery Recap
I have completed week 1 of my Factory Pickup.
I am going to describe many of the things that I have experienced. I am going to start with the opening statement of:
“WOW – I AM VERY GLAD I DID A FACTORY PICKUP”
The experience I had this week has blown me away. The absolute professionalism, attention to detail, and good ol customer service is just the beginning of why I am happy.
I did a factory delivery in 2013, and during that time I never met my team lead, and had very little feedback. I was still happy then. Part of the issue in 2013 is that I rushed them to meet a deadline, and should never have done that.
This time, I did the exact opposite. I gave them 6 weeks instead of the standard 4 weeks to prepare. This was primarily due to a planned trip to Europe, but also knowing that the time would potentially be used to address items.
I was asked about how you do a factory delivery with a family, and I held of on responding until I tried it. My oldest 2 are in college, but we home school our 11 & 7 year old children. I wanted the entire family to participate, but the 6am schedule was going to be rough, and then there is the whole question of what do we do from 6am to 2:30p.
The new service center is very nice, but it feels like a library when you walk in there with 2 young kids.
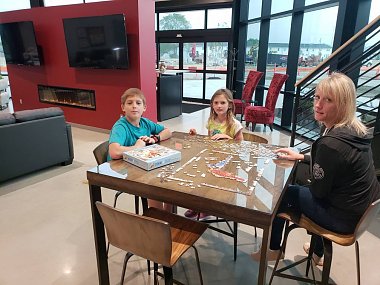
To make things easier on our family, I rented a home for the week. We drove from Texas and arrived Sunday afternoon and settled into the home. Monday morning at 8:30 we arrived at the new facility and got to work inspecting and learning.
After the initial OOH’s and AahHs, the kids went to work opening every door, looking for scratches, missing parts, and anything that would later be blamed on them.
My wife started looking over the paint, and I started playing with all the new gadgets inside.
My 11yr old son took charge of testing the electrical circuits using the plug in tester, and made an interesting discovery right away that the kitchen table and couch are not on GFCI but the other side is. (more on that later)
My 7yr old daughter found areas under the slide where the protectant was scratched exposing raw wood…it was just at the right height for her. She was so proud, she wanted to make sure I posted that

The family spent all of Monday with the coach, and then we all went on a test drive. During the test drive it was obvious that the coach was driving much better than our 2013.
Freightliner has really improved the ride. Keep in mind, that we are comparing a 2019 Stock 43′ Dutchstar to a 2013 43′ Dutchstar with Active Air. The smoothness of the 2019 is very noticeable. I think this has to do with better shocks, and larger tires. Our 2013 had 315/80’s all the way around, where as the 2019 has 365’s up front. Being able to drop from 115psi to 105psi up front helps a lot too.
After the test drive we spent the evening testing more, and building our list.
–FPU DAY 1 Items found—
Throughout the day we made lists of items found. Our tech was with us the entire time, making note of what we found and creating work orders. I found it helpful to keep my own list, and then verify that our lists were in sync.
The biggest area of concern I had was the paint. We found many areas where there were buff marks. I am going to get out of chronological order here for this issue because this is not yet resolved. Through out the week, this list kept getting bigger as we would move it into different lighting and find other areas that have problems. The end result is that I will be returning at a later date for paint booth time. There are areas of the coach that need to be painted, and my lead felt that the cut and buff was not done properly, and needs to be fixed. I will know more later, but I felt this was the right answer. Three different days we had areas worked on, only to later see that the area worked on had new problems not previously seen. The lighting in the service bay is not proper for doing paint work, and you cannot see the swirls inside there.
Other issues found Day 1 are below. I am going to list the problem, and the resolution, even though the resolution most likely happened during the week.
Interior:
- Area below Kitchen sink had a trim piece unglued.
–Resolution: Hot glue gun applied the trim - Zone 2 of the AC was showing 55 degrees for inside temp when all other zones showed 72
–Resolution: This was an issue that showed up a few weeks ago for another tech. That tech spent about a week trying to figure it out. This is actually an error code that does not exist, so it shows an improper temp. The problem is the freeze sensor was malfunctioning. The freeze sensor is in the rooftop unit, and inserted into the coils. When this malfunctions, it will report a lower than normal temp. There is not a magic number of what will be displayed, it will just be lower than normal. R&R freeze sensor resolved the problem. - Kitchen slide was making a noise during operation
— Under the kitchen sink, toward the rear of the coach is a bundle of pipes and wires, all in a wire loom and zip ties. This is a very tight bundle that was catching on a metal trim piece as the slide operates. By trimming the aluminum, enough clearance was possible. The noise was eliminated, and a visual inspection during operation shows that there is no more contact.
Exterior:
- Bedroom slide under coating has tear, exposed wood.
Resolution: Sealant applied over tape to prevent moisture entry - Fresh Water hose had kink going to back-flow device
- Water reel leaning/bent
Resolution: The kink was due to the way it was routed, and the hose being too long. The water reel had to be R&R in order to fix the bend in the aluminum. Once the reel was removed, the tech cut the line shorter and routed the back-flow device towards the back of the water bay (out of site). This made for a straighter path, with no kinks. The spool was reinstalled, and required a shim on the back corner to keep it looking straight. - 12v Electrical panel behind Shore cord was not closing properly
Resolution: The tripod option I had selected for ground satellite connections had 2 cables running in a way that prevented the panel from closing. These cables had to be re-routed. - Caulking Issues: Multiple areas had caulking issues. Day 1 I found about 3, but throughout the week I kept finding more the harder I looked. The areas that had issues are: Girard Awnings, Girard Shades, Drivers window, Front Cap trim on driver side, driver side marker lights, side cameras, front LED lights, Kitchen slide top rear corner, Front foot well, and mid coach roof trim joints.
- Slide LED lights Don’t match Girard Lights
Resolution: The Girard lights are preinstalled by Girard and are a “Cool” light. Newmar does not purchase or stock any led light strip that is cool. All of their led strips are a warm light. This is used in multiple places, such as the pantry, the front driver cabinet and the stair entryway.
Newmar does have an led bar that is cool, used in the bays of the coach, but this is a different type fixture, and comes in specific lengths, not cut to fit. The answer ends up being, there is nothing that they are going to do about it, other than make a note to production for future coaches. This is easily resolved on amazon, and something I may do.
- Peg board bay extremely hard to close
Resolution: Although all bay doors are hard to close when new, this one was not going to close. The tech adjusted it so it would close better. - Diamond brite had stretch marks, bubbles, and scuffs.
Resolution: The Diamond brite section was removed and reinstalled. The guy that did it made it look so simple, I was amazed. I have heard how other struggle to get it to come off. He used a water soap solution, along with a heat gun. Once he got a corner going, he kept it wet and heated and just pulled on it. He didn’t allow it to tear, which appears to be key. - Newmar logo on full wall slide was crooked
Resolution: It was R&R. I thought this was funny, as it wasn’t just off slightly…it was very crooked
Chassis Issues:
- Both drive axle outer wheels where scratched badly
resolution: Newmar really came through here. Originally I was told this would not be repaired during FPU, but I would have to deal with Freightliner at a later date. I wasn’t looking forward to a Freightliner visit so soon, but didn’t see any other option. On Wednesday, when my Team leader returned from vacation, he placed a call and had new wheels delivered same day. Newmar paid a local tire shop to R&R the wheels on the coach, and I was able to get the shop to install my Centramatics at the same time. Worked out perfectly! - Chassis battery bay clips broken on fuse box
Resolution: A new fuse cover was delivered, and reinstalled - Engine block shows rust, along with rust on several accessories and pullies
Resolution: Freightliner treated all of the areas and repainted. They used a wax heat paint, but I was never able to get the brand.
This is the end of the Issues found and reported during the FPU that are warranty items.
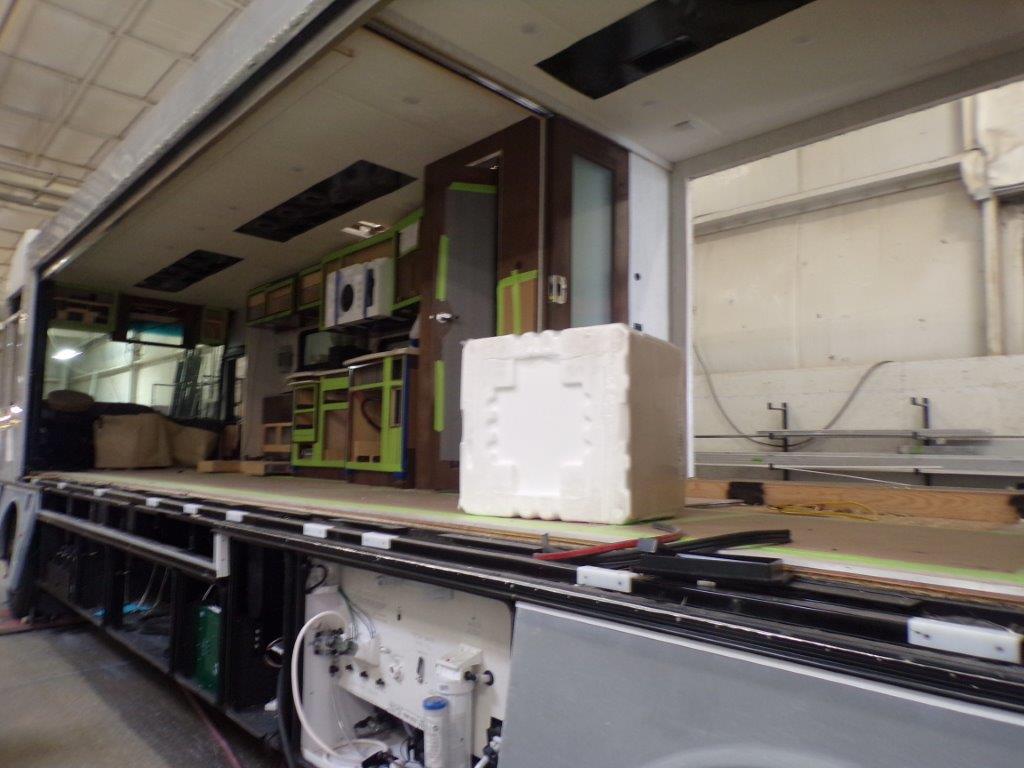
While at my FPU, I discovered the doors to the bedroom do not allow for any privacy. I brought this up with my tech on Tuesday. I didn’t know that this was an issue when I placed my order, and it wasn’t until after my coach was built that I even knew they had glass.
I also brought up the lack of what is called a privacy box in the front side windows. I showed him a couple of pictures found here of what I wanted.
They tried to have the wood work completed by Friday, but it was clear on Wednesday it wasn’t going to happen. Since I have a scheduled appointment in Iowa for HWH Active air, I could not wait until Monday, so we have agreed that I will return after my Active air to have the millwork items installed.
Another request I made during FPU is the anti belllow device for the Girard slide toppers.
While discussing this with the team lead and my tech, they agreed that the magnets need to be added to their checklist and checked all of mine. They all needed to be adjusted, and that was done as part of the warranty work.
I asked them to install 2 additional antibellow brackets on my FWS, and 1 each on the other slides. They were unable to put the main awnings out inside the shop, and it was raining very hard, so we didn’t deploy the awnings. I found out today that the rear awning does not clear antibelow device on the bedroom slide, so I had to remove it. The bedroom slide topper is the smallest, and held with the same 2 magnets as all of the others, so it is the least worrisome.
Wednesday was the day that the Air conditioner issue was worked on. The new service center has a nice catwalk system to be able to safely walk around and access the roof of the coach. While the tech was working on the air conditioner, I went up there and took pictures of the roof and accessories.
While I was up there, I started looking for my prewire specials (1 Cat 6 and 1 RG6) and discovered it was not labeled. We had to put in a request for this to be located. Friday morning the techs arrived with a toner, and started hunting. They found it after about 30 minutes of looking, with only a single hole in the roof, and then removing a ceiling light.
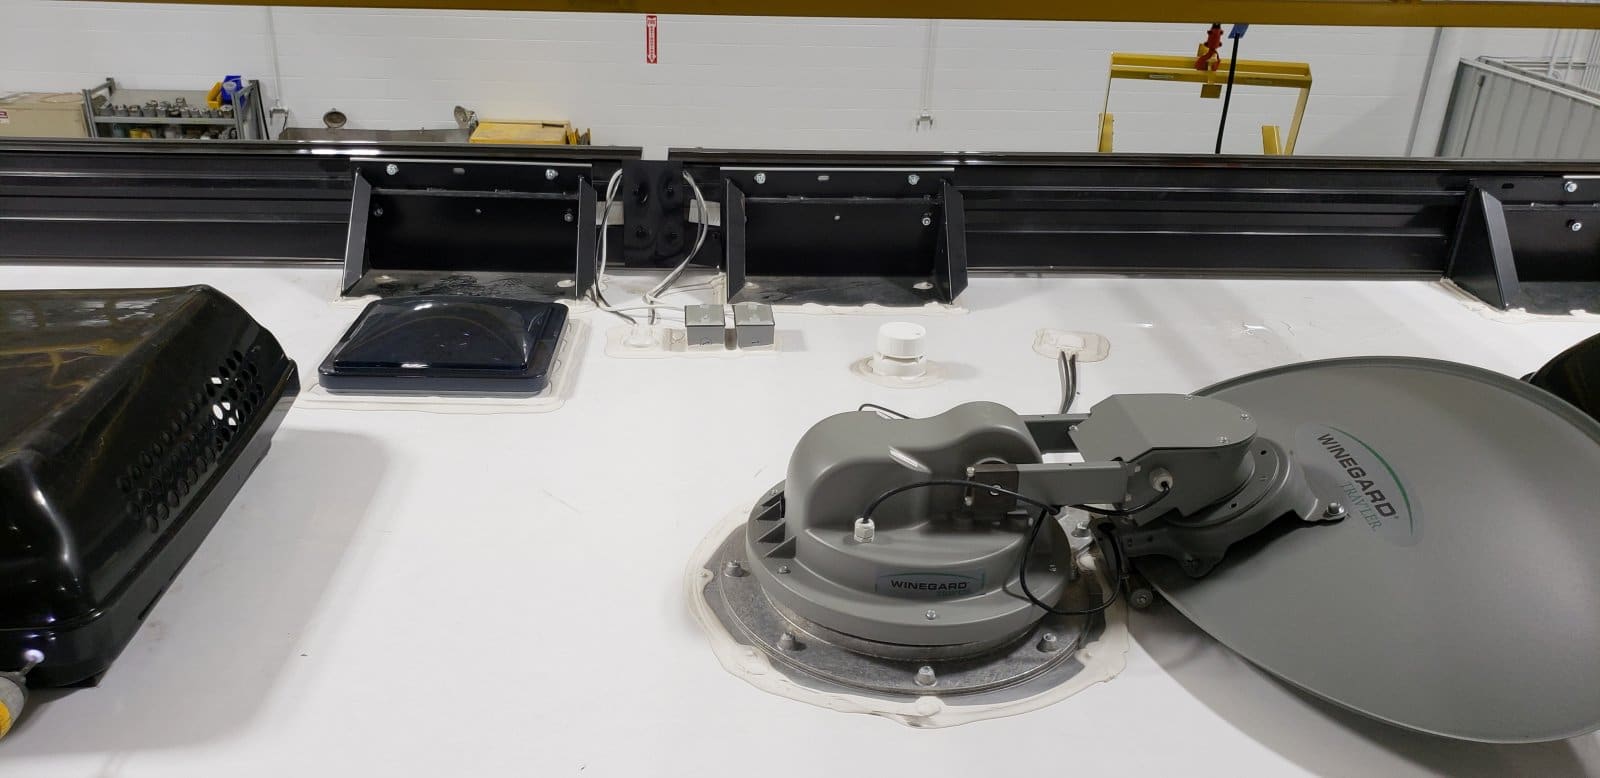
The cables where then covered with a plate and sealant. Glad I discovered it missing when I did.
A few of the special projects I did during the down time this week are install the BMK and the HW50C Surge protector.
The BMK installation was a priority for me, as this is the best way to maintain a healthy battery.
In order to install this, I needed 2 4ft 2/0 Cables made. I was able to get this from Newmar as a parts item.
The default battery configuration has 3 ground wires connected to the battery bank, in 2 different locations. I removed those 3 cables, and placed them on the load side of the shunt. I then chose the battery furthest from the positive connection to run my negative wires to the battery side of the shunt, using both 2/0 cables between the shunt and battery.

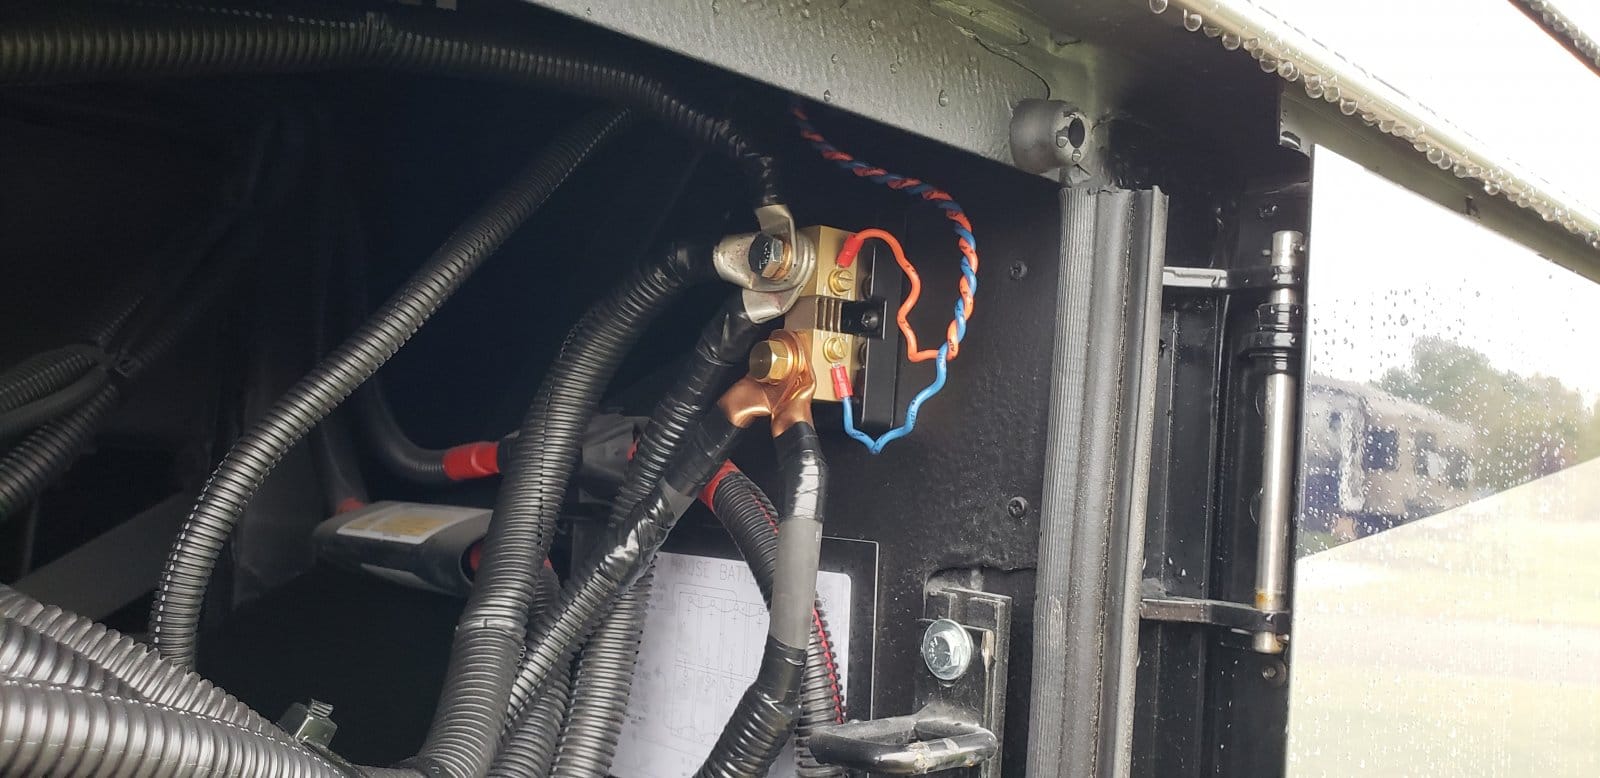
With this installation, the battery tray will still fully extend.
**CAUTION:: When disconnecting your batteries, you must remove the POSITIVE first. Failure to do so will destroy all of your inverter accessories such as the BMK, AGS-N, and possibly the inverter itself. The positive cable is the first to be removed, and last to be installed. Never disconnect the ground while there is a positive battery connection.
I know this defies how we were all taught to deal with DC connections, but this is specifically mentioned in the Magnum manual.
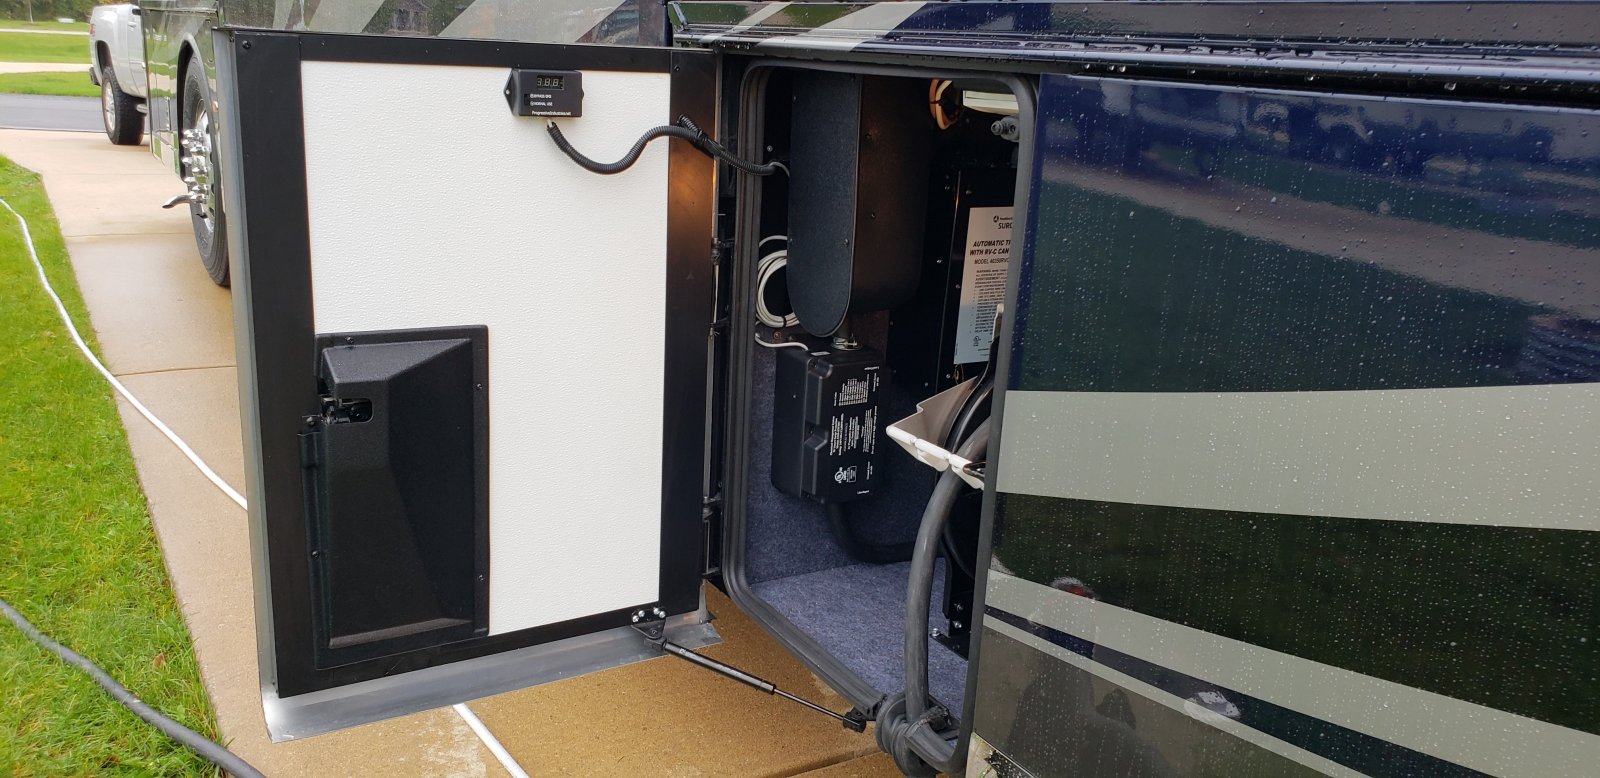
For the surge protector, I wanted to make sure I could easily return back to the factory setup if I ever wanted to. I removed the cord from the reel to the surge/transfer switch, and installed that to the input side of the EMS-HW50C. I had previously ordered a 4ft section of this same cord from GlennDinning, and used that to run from the output of the EMS-HW50C to the input of the Surge/Transfer switch.
The location I used for mounting the EMS-HW50C was where the cable/ground sat connection was located. I relocated that to the ceiling of that bay, since it is rarely used, and still very usable in the new location. This allows for easy access to the EMS-HW50C. The remote was secured with 2 sided tape to the bay door.

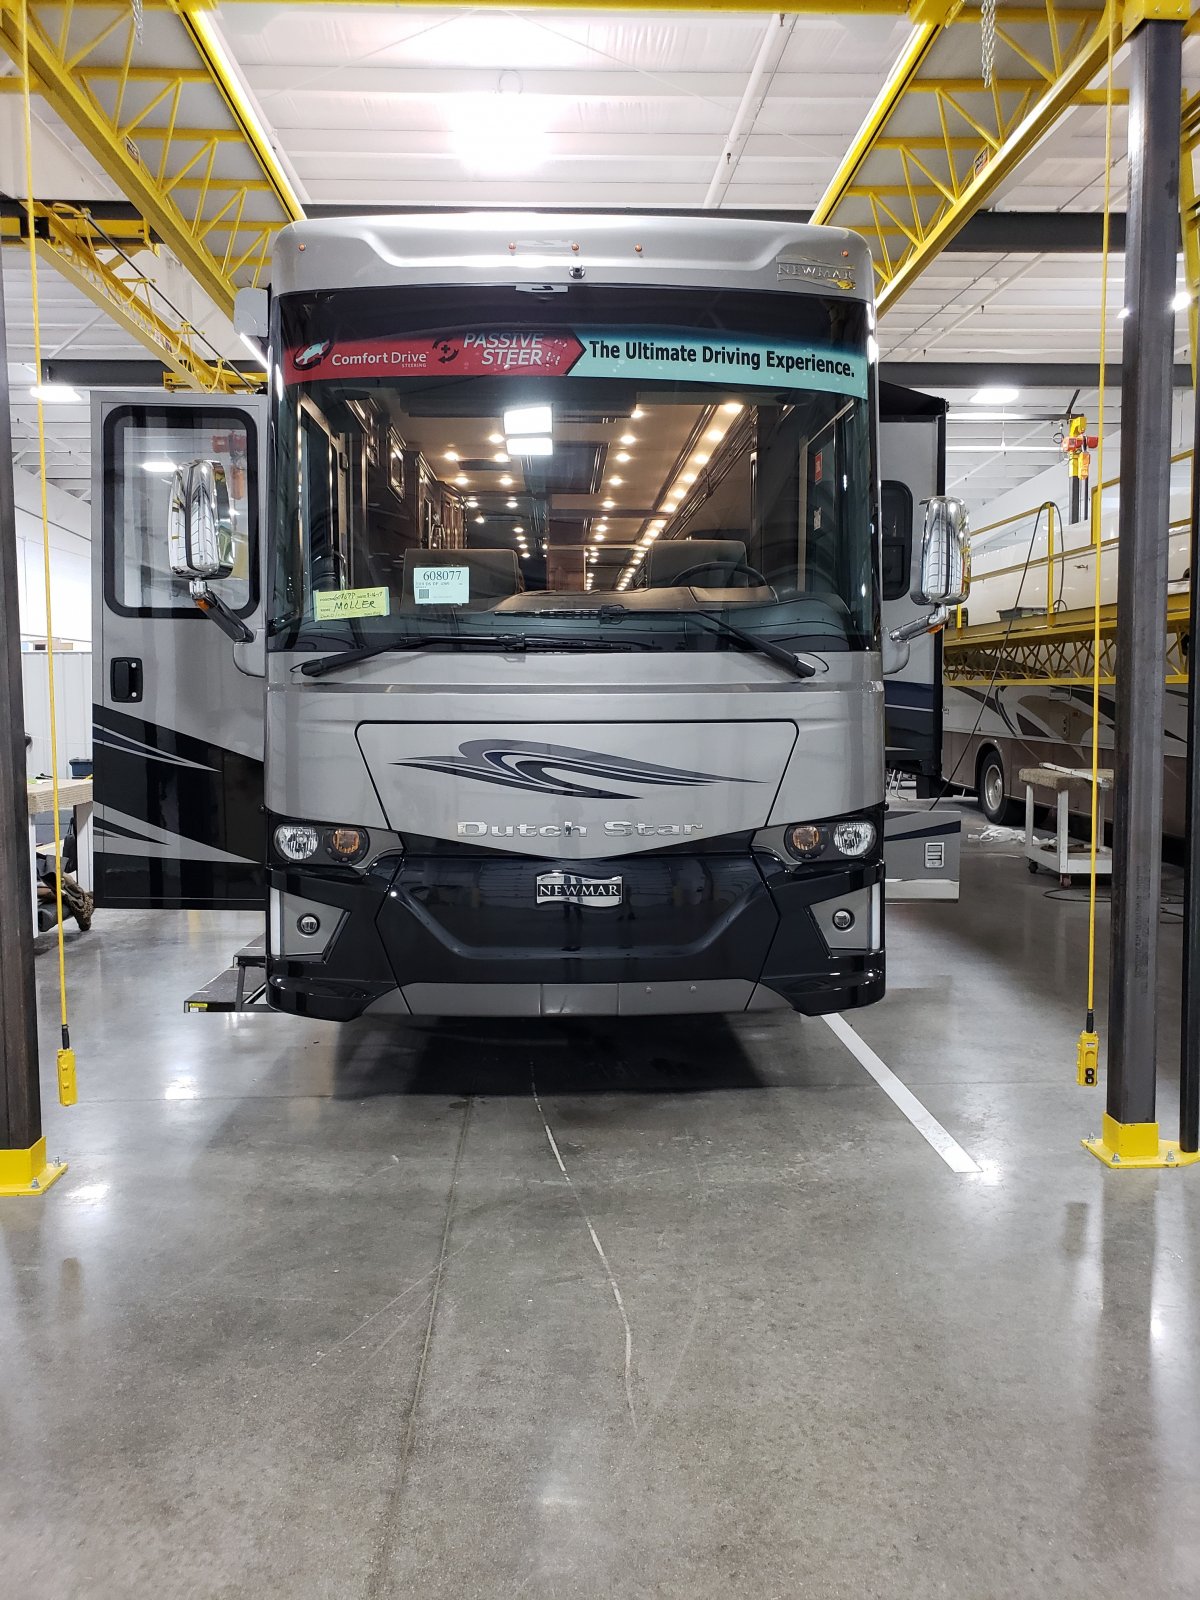
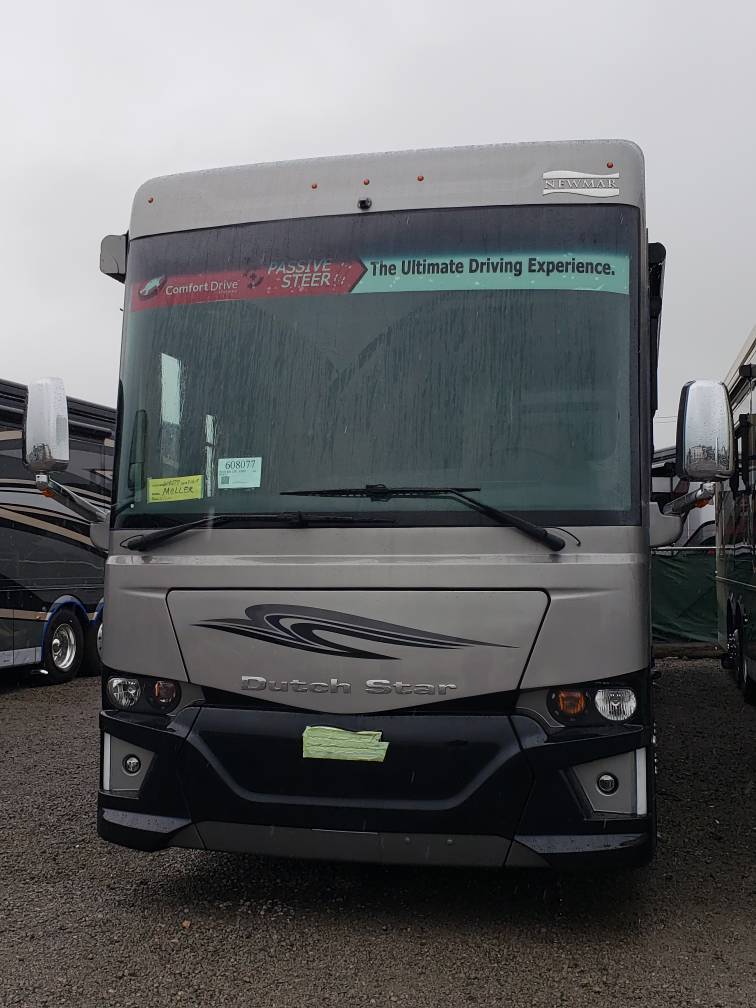
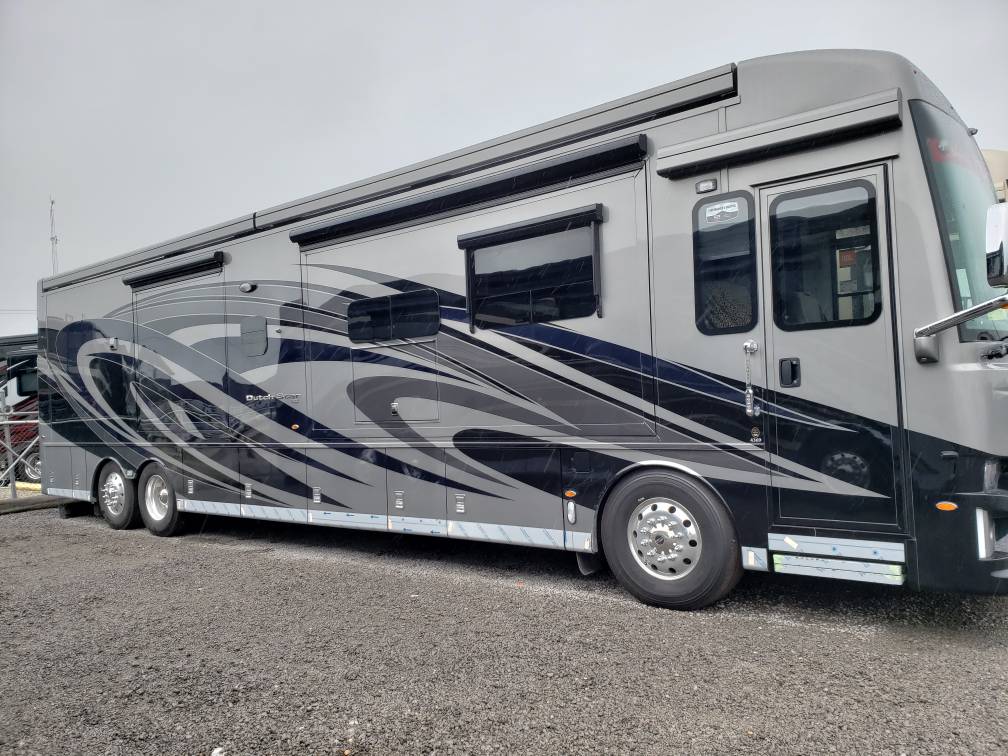
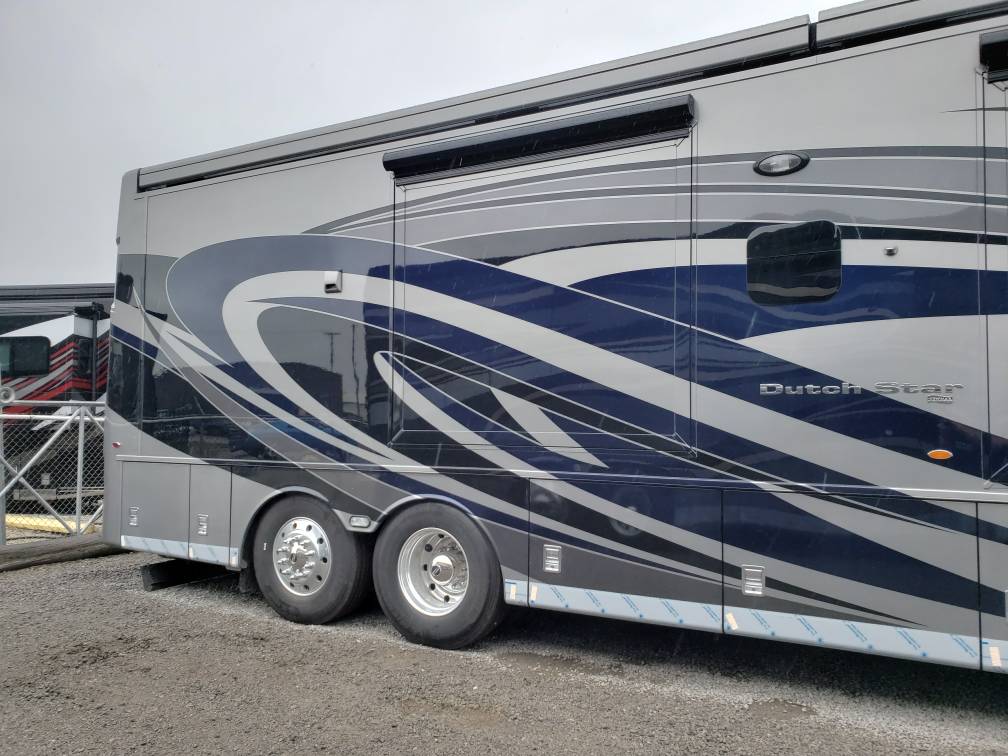
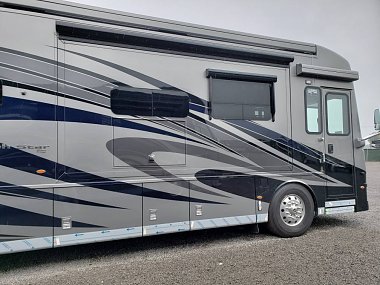
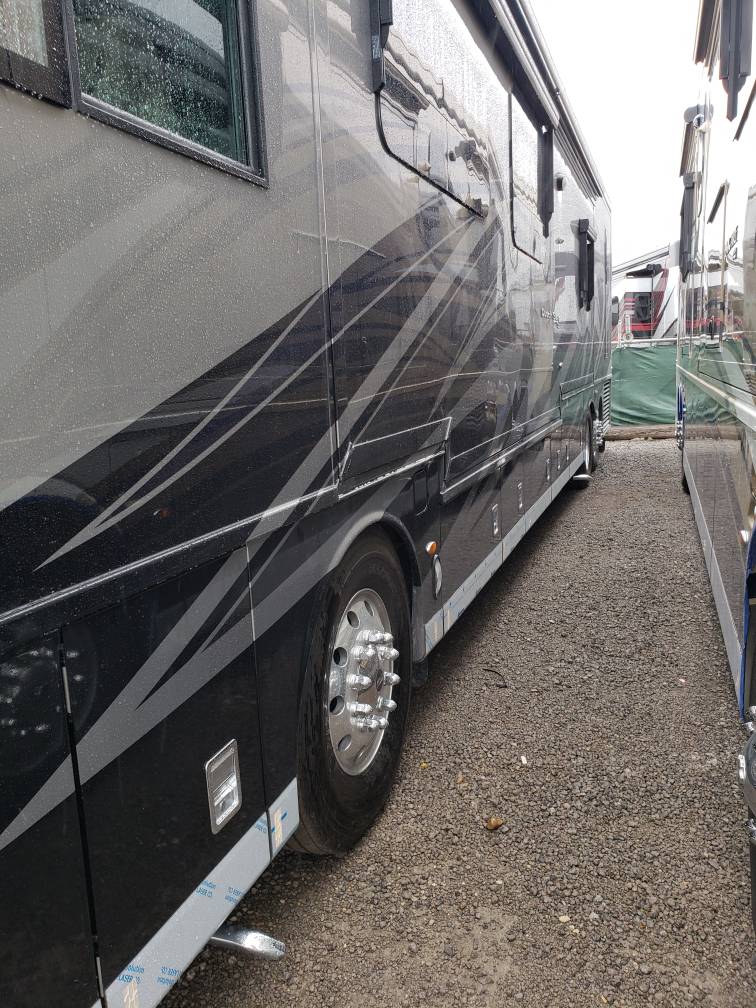
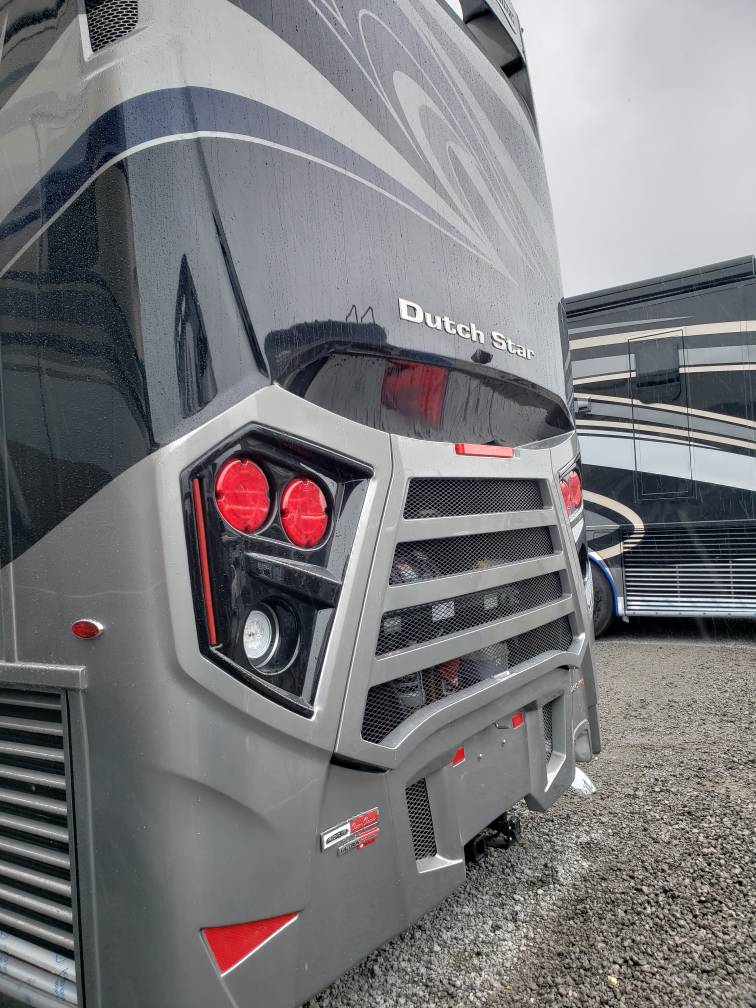
2019 DSDP 4369 – Spy shots from the Yard
I have a spy at the Newmar factory this week. Mark was in Nappanee to tour the factory while his coach was being built. He went outside on a self guided tour of the coaches waiting for delivery, and took these spy shots of my 2019 DSDP 4369.
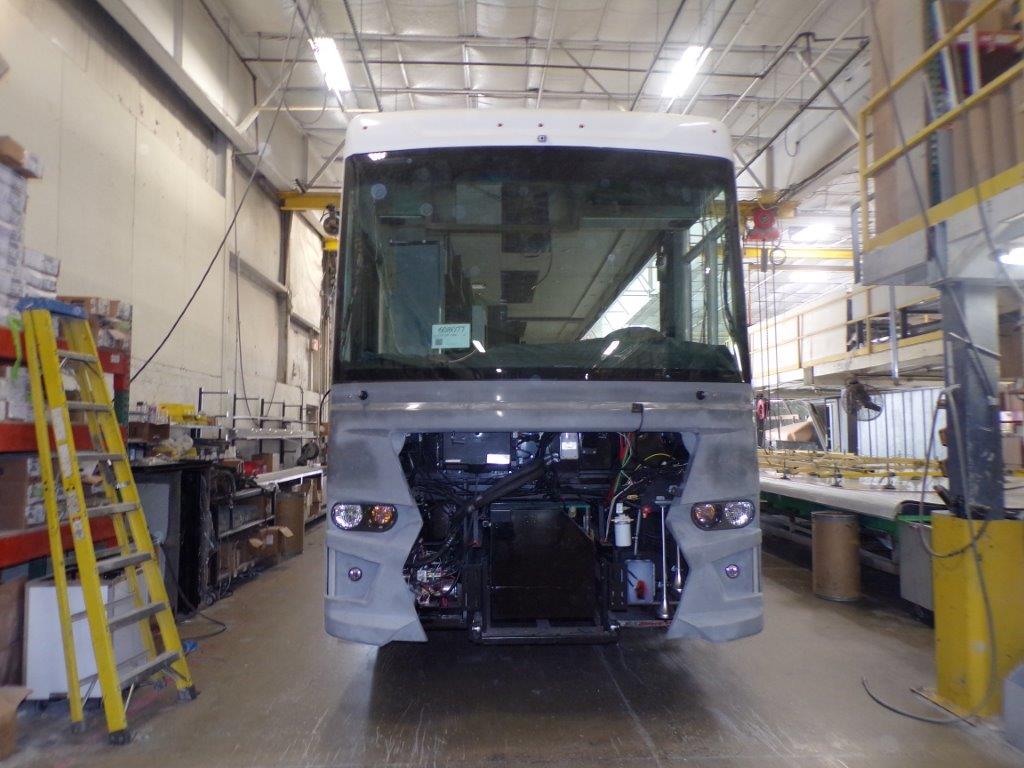
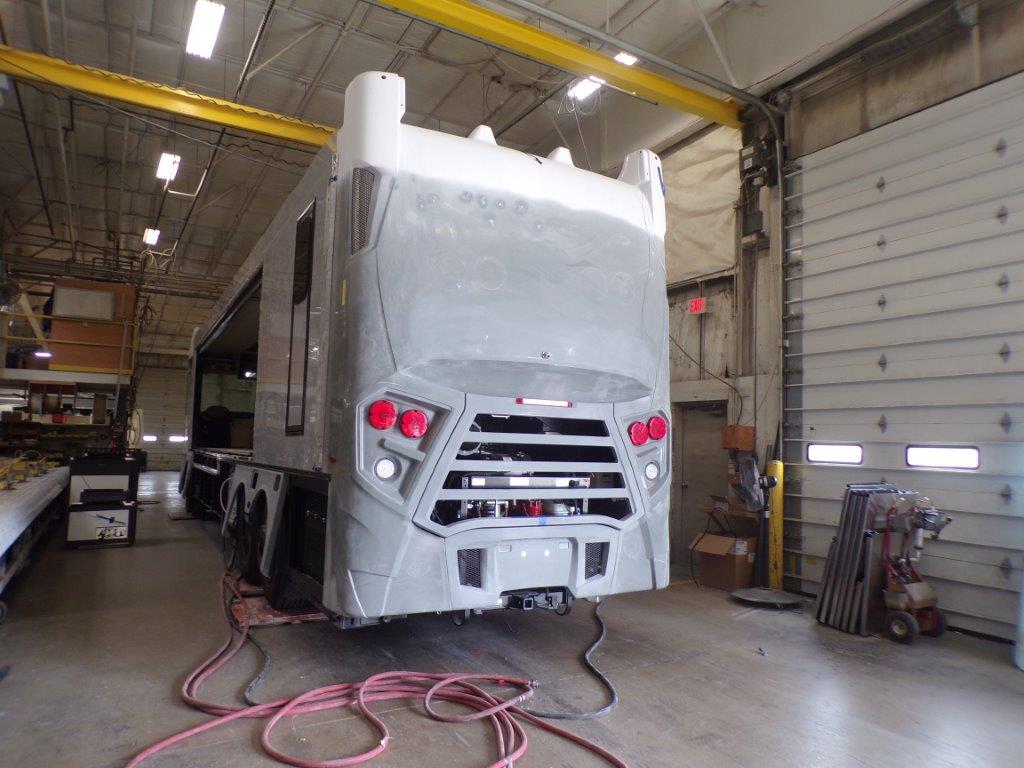
2019 DSDP 4369 – In Production
My coach is finally in production. I detailed the build here when I placed the order in May 2018. Today it is in building 7 where the house construction is taking place.
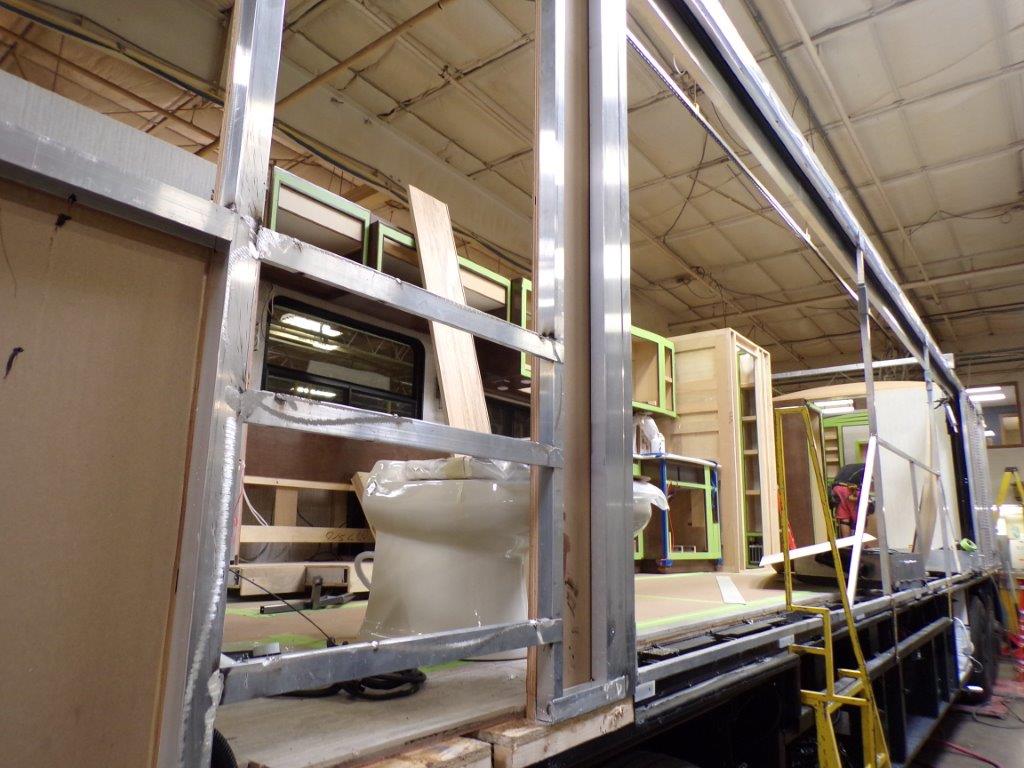
Day 2 Pictures
2019 DSDP 4369 – The RedBaron73 Build
It was November 2012 that I finalized my order on the 2013 DSDP. In order to get to that point I had endured 3 bad dealerships, with one being a failed delivery earlier in November. The dealership we chose at the time ended up losing their newmar contract, and ever since then I have been paying attention to dealerships that I would even consider dealing with. There are plenty to choose from that are reputable, but a few really stand out.
Price is always a concern, and often I buy on price alone. Alright, most of the time I buy on price alone. In this case the additional factors that came into play is working with a dealer that there is absolutely no question about their history of standing behind their product and delivering exactly what they say they will. A couple of things that were important to me: 1) Factory delivery, 2) Keeping my RV until then, 3) Not playing games, and 4) Delivery in October.
As we all know, May 11 was the day that all the information was being released. I started emailing several dealers on the 9th, to establish a relationship, and to be on their list for first responses.
When I did receive the initial information about what was new, the changes from 2018 to 2019 are not what I would consider significant. Unlike the 2015 to 2016, there is nothing brand new about the 2019 Dutch star other than the exterior end caps. All of the technology that is in the 2019 has been available for Dutch star for at least a year, and most of it multiple years, with the exception of the Digital Dash. All of the known issues with prior years, such as Tag Axle, Slide Level, and front axle weight have been addressed, so the change to a new model year is going to be much less strain on the production line than some prior years. For that reason, I decided to jump on the order ASAP.
I placed calls or sent emails to my personal top 3, and ended up choosing to deal with Chad @ Midway RV. He not only responded with the information I wanted, didn’t waste my time, but also provided fair pricing up front without haggle. Early on I expressed the concern about timing, with factory delivery in October, meaning a September production date. Because this week was so frantic, and I had specials, it was hard to nail down an exact timeline, but Chad was able to hold a spot for me while we worked out the final details.
On paper, we had decided that the 4362 was the right coach for us. The floor plan is very similar to our current 4347, with several improvements. From the moment I started working with Midway, we were talking about the 4362, the specials, options, etc. I even had Chad send in several requests from Newmar for the specials. I told him before we signed the paper, I was going to another dealer to see the 4362 in person, and would sign afterwards.
After comparing the 4362 to the 4369, and going from one to another multiple times, we ended up choosing the 4369. Both are great floor plans, and it was a tough decision. The reason we choose the 4369 over the 4362 is listed below. This is not a negative to the 4362, just our personal choice.
- Shower – The 4369 has the step-up at the bedroom to bathroom. The 4362 has this step up much further back. The result is the step into the shower is a large step-up. We didn’t like this.
- Pantry – The 4369 has a pantry nearly twice the size of the 4362…Huge improvement for an area that we really could use more storage.
- DS Couch – The 4369 couch is 74” vs 68” on the 4362. We have tall kids, so this is a feature they will enjoy. The ODS couch is larger in the 4362 (92” vs 87”), but they both make the same size bed. The way that the DS Jack Knife bed and ODS side bed fold out leaves room to walk between them. This is not the case in the 4347, and as far as I am concerned, a MAJOR upgrade. Traveling with kids, we use the beds all the time.
- Mid Toilet Room – The 4369 felt easier to access. On paper the opposite looked to be the case.
Areas that we felt the 4362 was better: - Washer Dryer Location – We are not crazy about the 4369 location for the W/D, and feel the 4362 location is better.
- Walk in Closet – The walk-in closet is amazing. We have really enjoyed this. We are hoping since we are now traveling as a family of 4 most of the time, the room won’t be missed…time will tell.
- Linen Closet in Master Bath – This closet is one that we have now, and I am hoping we aren’t going to miss this too much.
That pretty much sums up the differences. When I called Chad to tell him we had changed to the 4369, he almost laughed at me (didn’t but was close), saying that he couldn’t figure out why we weren’t doing that to begin with.
Now on to the order. From the order sheet, the options we chose are:
- Freightliner Chassis
- Velocity Interior
- Bermuda Glazed Maple High Gloss
- Electric Floors
- All Electric
- Central vacuum
- Dishwasher in a Drawer
- Freezer on a slide
- 2pc Stacked Washer
- Exterior Tv
- Prep for Ground Sat
- Omniview PV360
- Sirius Radio
- Front TV
- Wineguard InMotion
- Xite Dash Radio
- Euro Booth Dinete with extra leaves & 2 chairs
- Heated Drivers & Pass Seats
- Sleep Number
- Recessed Dock Lights
- Surge Transfer Switch
- Baggage Door Stainless Steel Trim Kit
- Large Tray – 1 Side (Opposoite Oasis)
- Large Tray – 1 Side (DS Large Full pass thru bay. Only ½ will have a sliding tray )
- MCD Power Shades
- Safe in Wall
- Shoe storage
- Shower Assist Handle
- Hot Water at Generator
- Girard Package Upgrade
- Large Kitchen Window
- Customer Pickup
The Specials we chose are:
- Custom Paint
- GE Advantium Convection Oven ILO Standard Microwave
- KG19-100 FLOOR TILE Laid in the KGDB Pattern /c CREAM rubber strip
- RUN CAT6 & RG6 from roof to OHC above driver
- RUN CAT6 and RG6 from OHC above driver to AV cabinet above televator
- RUN CAT6 from AV cabinet above televator to bedroom av cabinet
- DASH TO BE ALL BLACK – NO TWO TONE
I was denied the special to have the Oasis pre-heat option installed, so Midway will be doing this for me after factory delivery. All other specials I requested were approved.
I am told that the production date is in September, with an October FPU. It will be 30-60 days before I get more concrete dates.
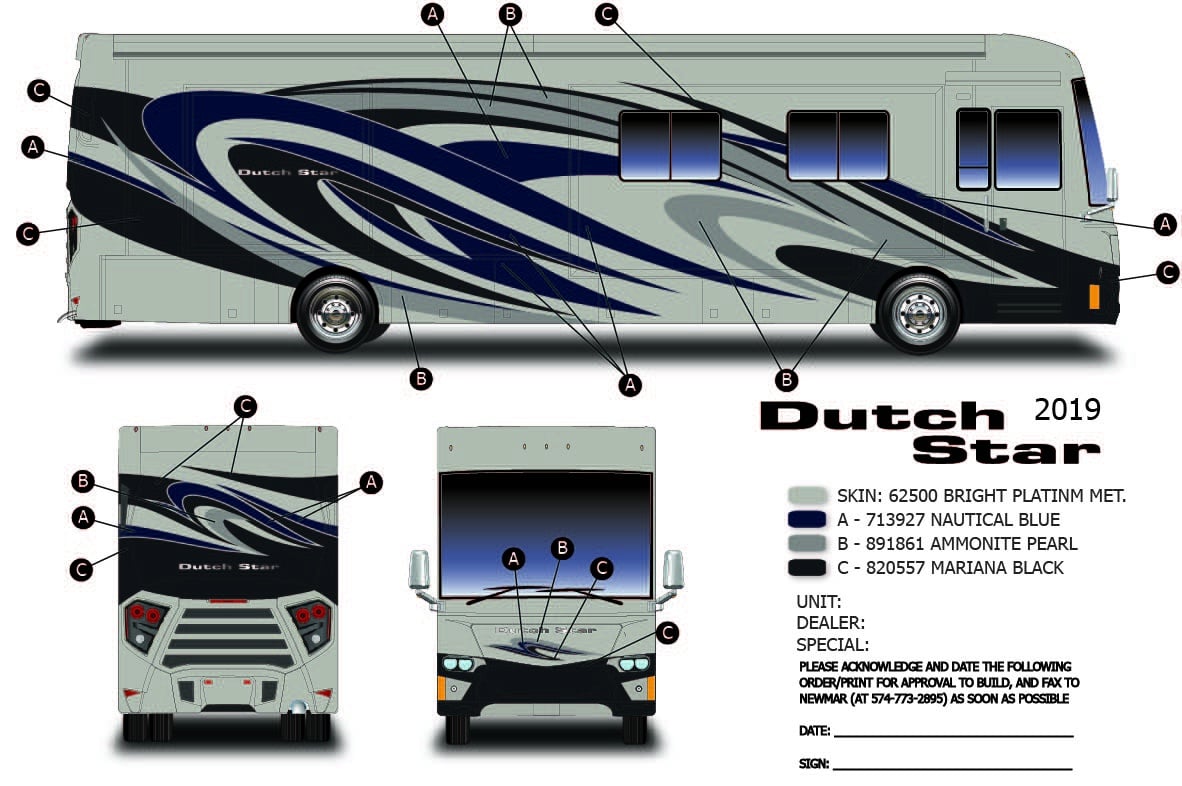
he custom color we chose for the exterior is based on the LADP Caprice. I changed the placement of the colors until i found one that looked right using Adobe Illustrator.
The screen representation is no where near the actual, so I am attaching a copy of what one looks like. The Marina Black will have a blue appearance in some light.
I will be working on a list of planned customization’s. So far this is what I have on the list:
- OASIS PreHeat Loop
- HWH Active Air
- Centramatics all the way around
- Fence Post Sewer Hose Holder
- Weeboost LTE Signal booster
- Wifi Directional Booster
- Spot Free Rinse / Pressure washer install
- Soundbar replacement / Upgrade
- BMK Kit
- Silverleaf VMS350
- TST TPMS
- Sewer 360 Siphon Vent
- MaxAIR Vent covers
Installing a Battery Monitor Kit (BMK)
Thought I would put some more of my modifications up. I have been working on installing the ME-BMK in my coach. If you are not familiar, this is a Battery monitor kit that acts like a fuel gauge for the battery bank. It is a far more reliable way to determine state of charge (SOC).
You can read about it here: ME-BMK Battery Monitor Kit
I attempted to get Newmar to install this as a special, and was told no. Well it turns out that there is good reason for it, and the upgrade is very involved with the 2013 Newmar coaches.
The typical installation of a BMK is to install the battery shunt between the load and battery ground, install the ME-BMK-NS device. Provide 12v power to BMK-NS, connect the network to the inverter, and install a sense cable between the BMK-NS and the shunt.
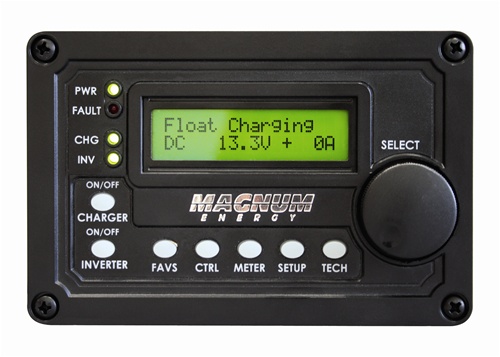
The 2013 Newmar coaches come with the Magnum ME2812 inverter, the ME-AGS-N (auto genstart network version) and the RC-50 remote.
For the features of the BMK, you need the ARC-50.

This is the easiest part to swap out, remove 4 screws, unplug RC-50, Plug in ARC50 and install 4 screws. At this point you must reprogram all of your settings. Do this now, as it will not be setup for your battery type.
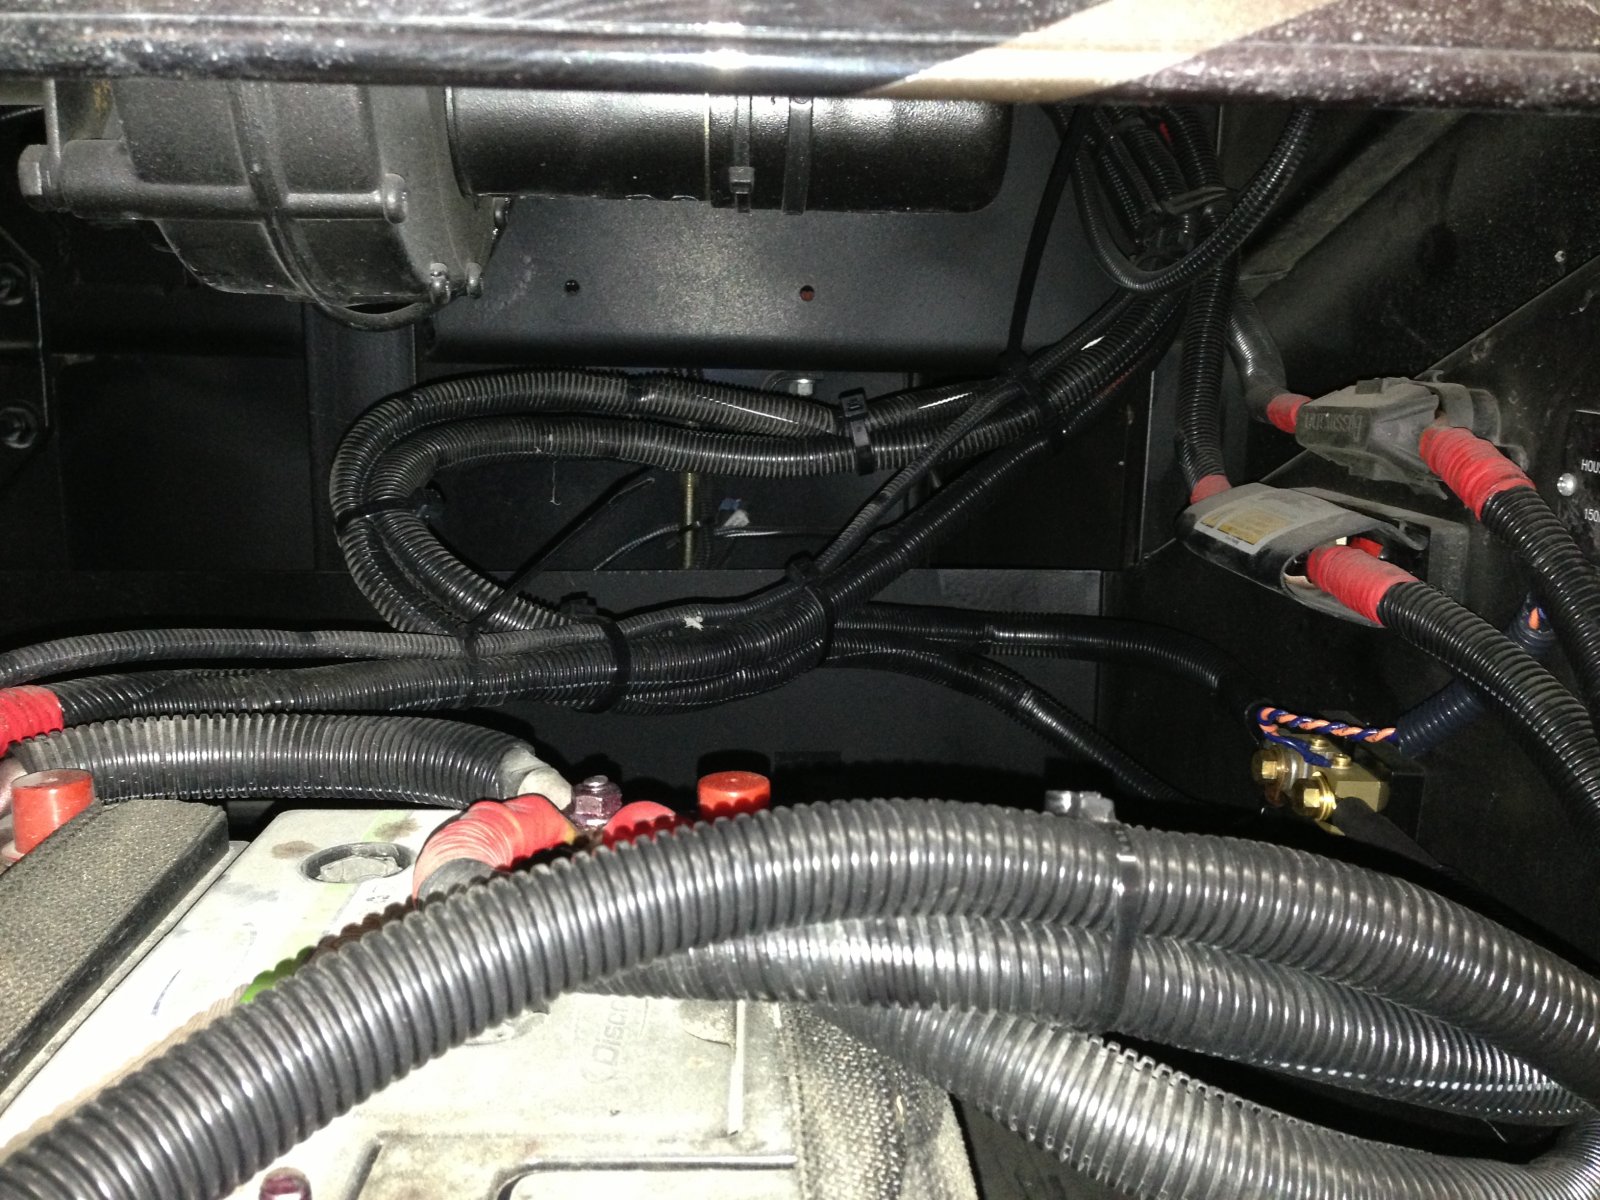
After installing the ARC50, then I installed the shunt. There are 2 ground bundles connected to the coach. Mine is the all electric, with factory AGM batteries. So I have 8 6v Batteries. From the factory there was a main 0-gauge ground going to the inverter, and then a bundle of about 8 smaller wires going to the main electric panel. These were connected at different points on the battery. For the BMK to do its job properly you need to move all ground wires leaving the battery to the load side of the shunt.
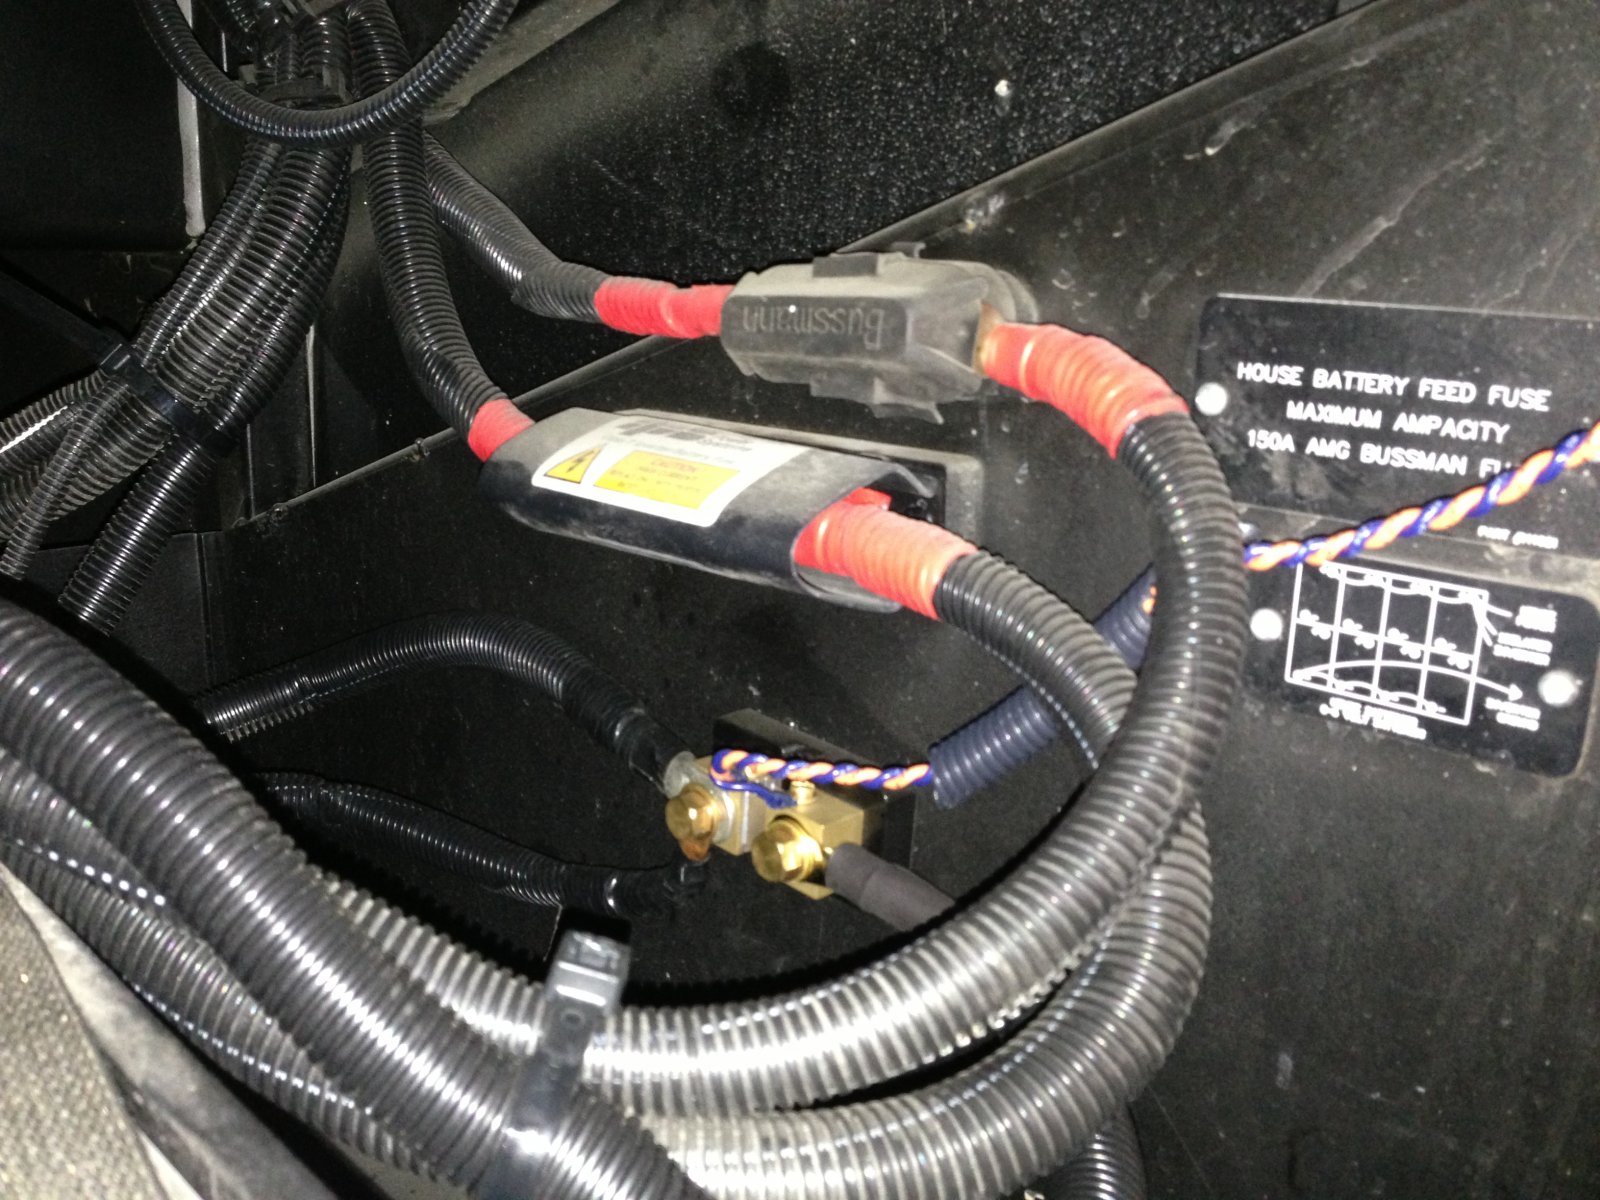
In the above picture you will see the shunt installed below the two positive wires. The back side is the load side, and the original wiring from Newmar is attached there. You will see two cables coming off the stud. I had to cut a lot of straps, and then reconfigure the straps so there was no metal rub and the tray could still slide. This wasn’t hard, but took some thought.
The front side of the shunt is where the battery connects. I made a custom 4/0 gauge wire, and soldered the ends instead of crimping. Lots of solder..and then shrink wrap the ends to make it look neat.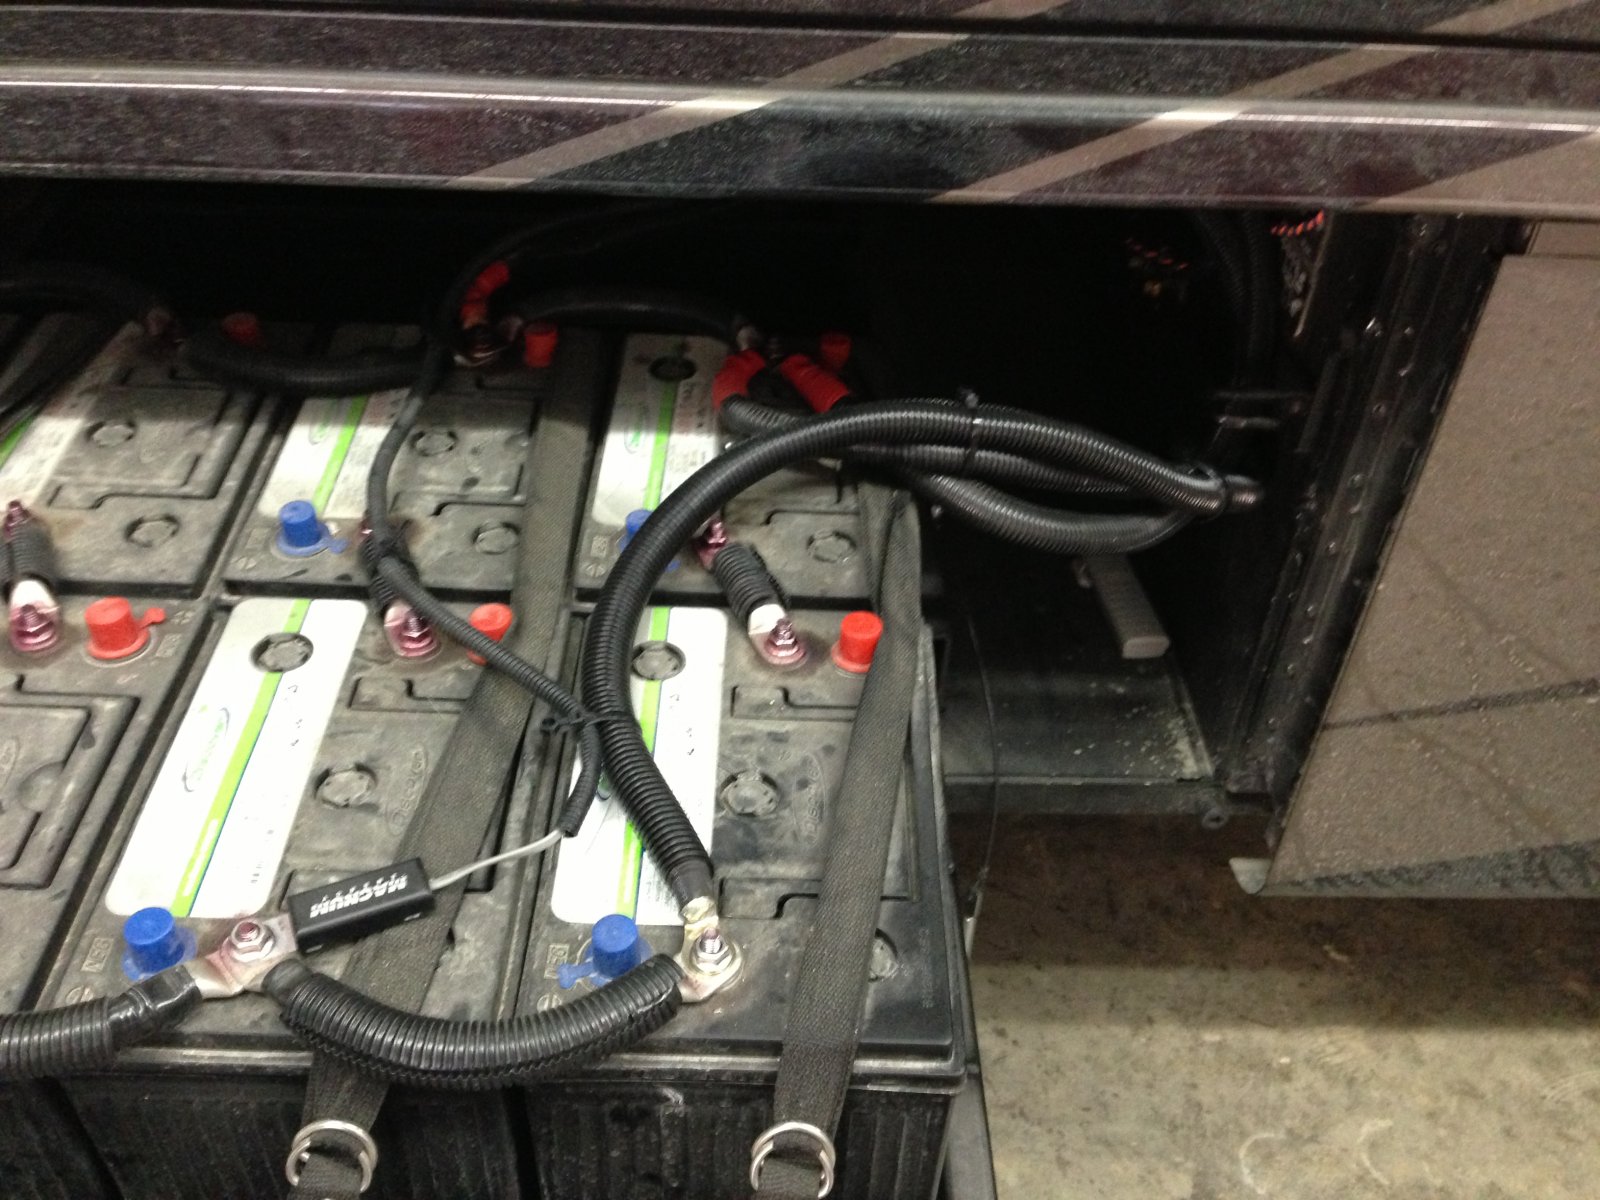
The above picture shows the battery tray extended, and the bottom right ground is my cable connecting the battery to the shunt. Just to the left is the temp sensor for the inverter, this came stock.
The BMK-NS module is installed in the bay closest to the battery, as the sense cable can not be cut or spliced.
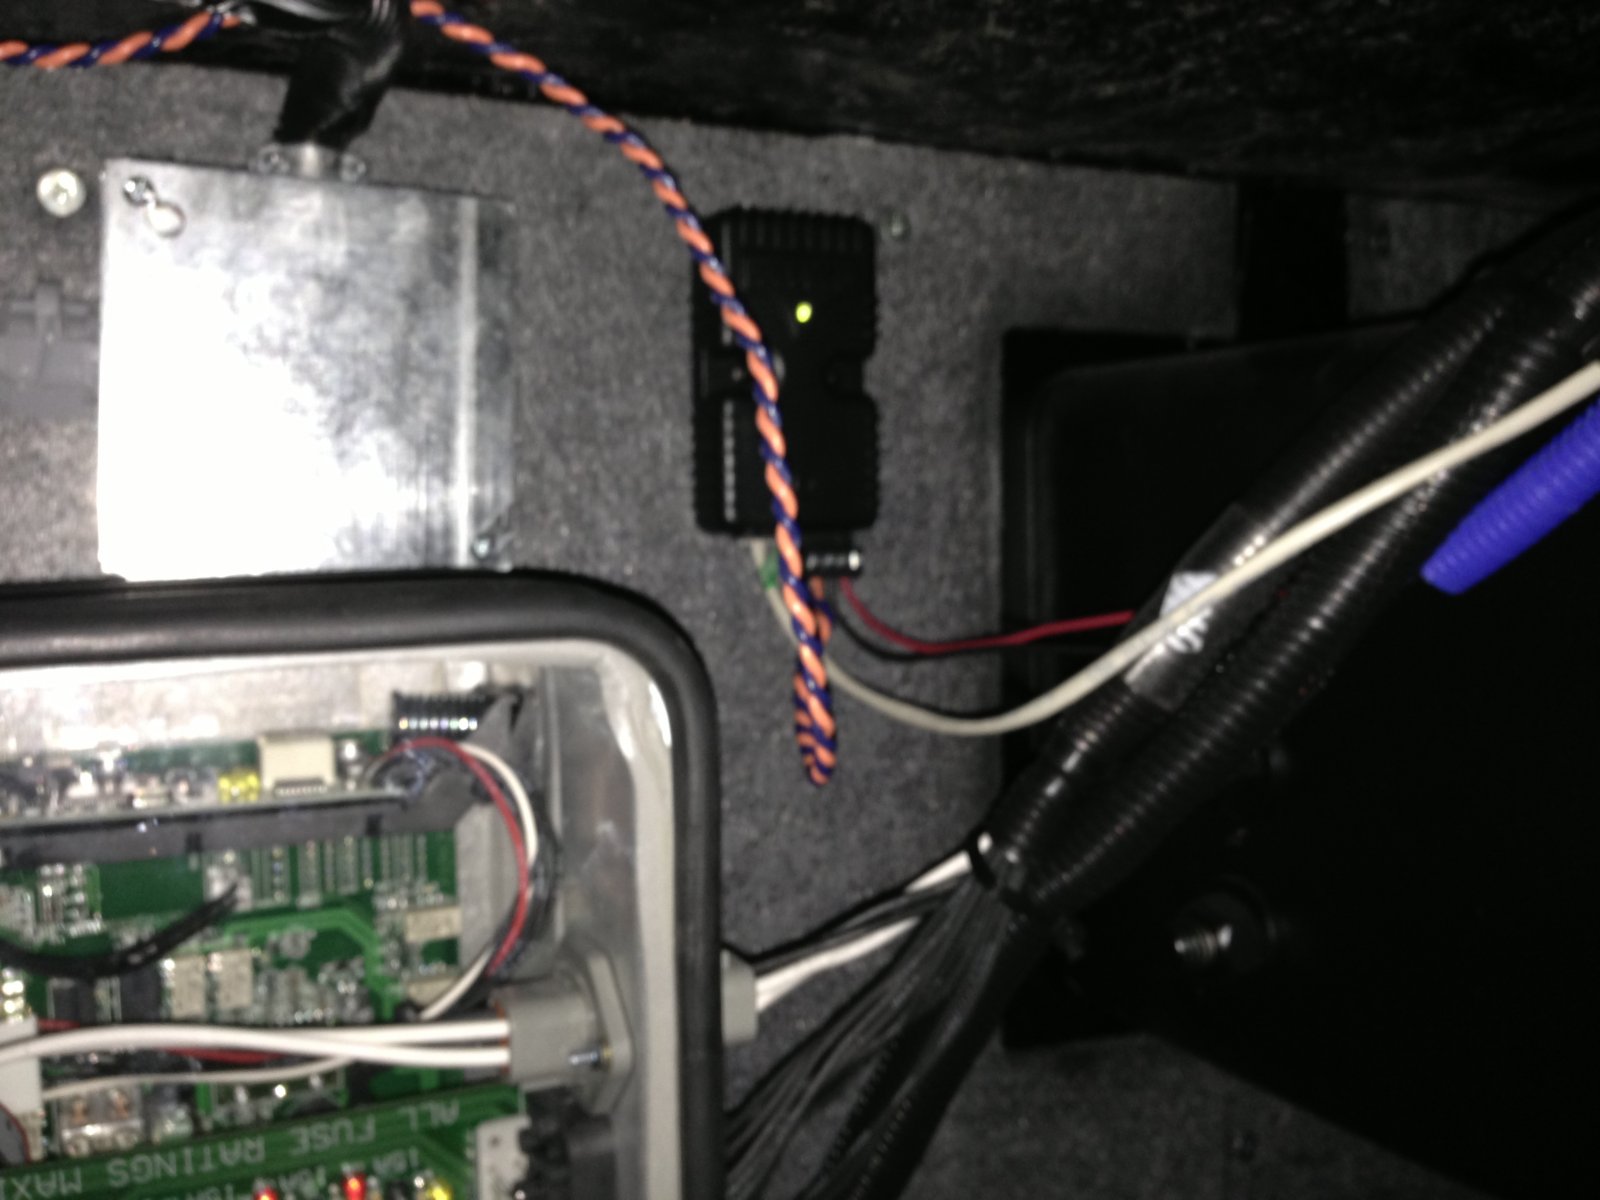
On the back wall is the black box with the power connection, data cable, and sense cable.
So after getting it all hooked up, I tested and things worked great. my SOC read accurate, I was able to drain it down to 80% and have it shutdown the inverter. Plug in power, and it charges back to 100%.
So then I decided to test AGS. I set the AGS to start at 80% and stop at 90%. Watched it drain down (helped with microwave) and once it hit 80% the generator fired off. After the 60 sec warm up it stopped. Then started again, and this loop kept going.
Frustrated – I double checked everything. In the mean time I had to stop my work, and take the coach to the dealer to get some work done. That was hard..I hate leaving work undone.
When I finally got the coach back I started playing with the settings and discovered that if the ME-BMK-NS is plugged in (either power or network) then the AGS will not function. Even turning it to manual run via the ARC50, it will do the cycle. I could start the generator with the dash switch, my software switch, or from the generator itself, but not from the ARC50.
If I unplug the ME-BMK-NS then it works from the ARC50, but of course now I can’t use SOC to start.
I placed a call to tech support at Magnum Energy, and after 50 minutes of diagnosis the culprit was found.
The 2013 Newmar coaches include a Power Control Systems EMS. The inverter actually connects into the Power Control module, and then the remote connects to another port on the Power control module.
Here is the diagram and install docs:
http://www.precisioncircuitsinc.com/…structions.pdf
In the mid toilet room, there is a cabinet with all the breakers. This box houses the PCS control.
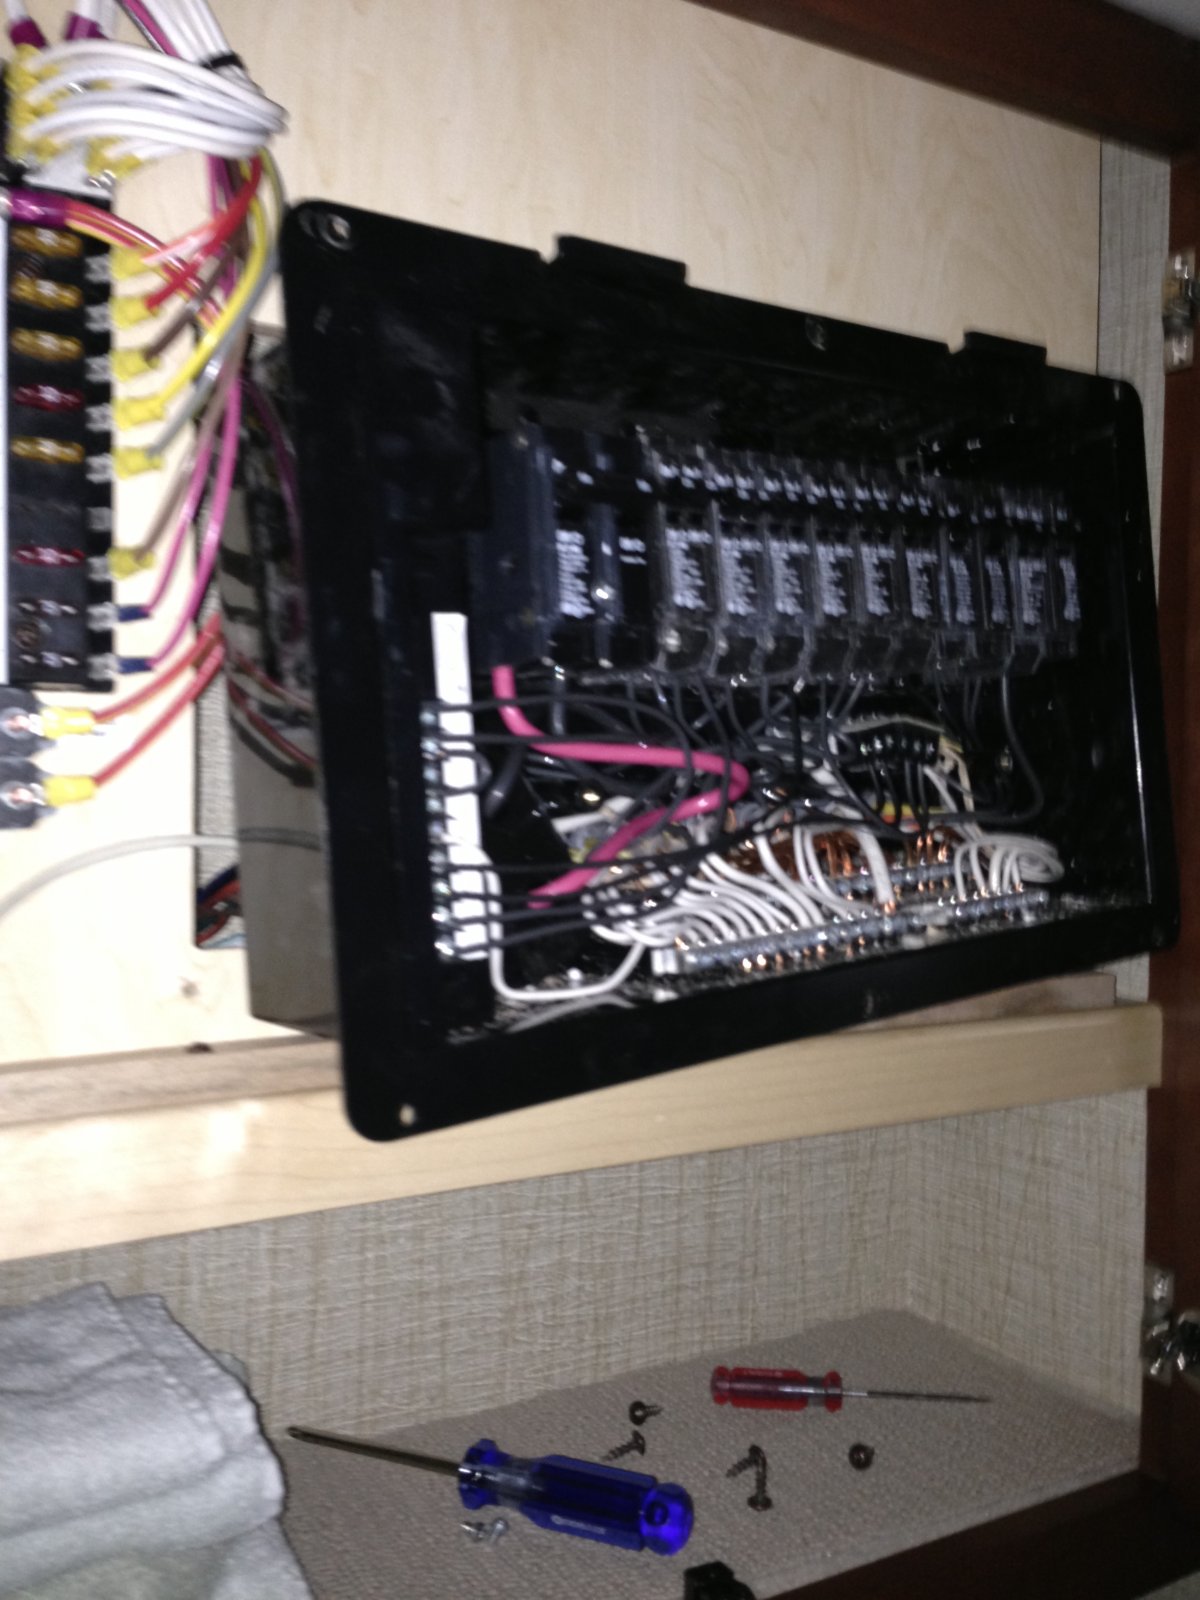
This picture shows the box removed. Lighting was poor because I had no 12V or 120V…that would have been dangerous.
3 telephone connections are behind. I had to locate the one with black tape (matches cable connected to magnum inverter remote port) and the one with blue tape labeled “remote”, which matches the cable going into the ARC-50.
Once these were located, I unplugged, and connected them together with a telephone joiner.
As soon as that was complete, and I fired it all up, things worked as I expected.
So my next step was to contact Precision Circuits and find out what I could do to make the BMK compatible, and what I was losing by doing the bypass.
I sent an email, and the response was very fast and informative.
Here is the response:
Quote:
| By bypassing the PCS system will cause you to lose two things. If you normally plug into 50A service, then this should not be a problem. If you regularly plug into 30A service, then you may want to consider updated the system. What you lose when PCS is not communicating: PCS will continue to operate, and will shed the Appliances, and continue to prevent circuit breaker tripping. Most people choose to bypass If you choose to upgrade, you would have to send in the PCS Monitor and PCS Control. We would be willing to upgrade free of charge, and could ship back to you within 24 hours of receipt. Just emailed with Magnum, and they state the ME-ARC50 already has the upgrade, The PCS Control is inside the Circuit Breaker Panel. PCS Monitor is the Central Monitor Panel |
PCS also sent me an upgrade document that outlines the complete install steps, and also gives info on what is gained. The biggest gain I can see is the communications is no longer done ‘man in the middle’, but rather part of the RS-485 bus. So instead of being a relay, it now assigns itself an ID on the network, and takes action that way.
There are a few new features, including the ability to set to 15amp service (30->20->15->30) and the removal of the blinking panel LED light.
Taken from document:
Quote:
| Additional PCS Features included in new Version: 1. PCS Central Monitor Panel a. Displays error message during loss of communications with PCS Control rather than appearing to be running. b. Displays message when PCS Control is busy communicating with Windows WinPCS program. (Requires Power Cycle to reset.) c. When No Service present, does not keep bouncing or forcing back to this screen; allows troubleshooting of other conditions. d. Unplugging and re-plugging Monitor during error condition does not mask the error. (Error message regenerates.) e. Installation without Magnum Inverter-Assist feature now displays correctly. 2. RV Data Mismatch error will no longer lock up system, but PCS will continue to retry in cases of poor connections or low battery. a. During an RV Data Mismatch, Control will continue to operate with RV Data it has stored, rather than stopping all operation. b. This error condition will no longer stop Magnum Remote/Inverter communications. 3. Force RV Data from Remote to Control. a. If Control has been mis-programmed at the factory with the wrong RV Data it no longer needs to be replaced. Only a new Monitor needs to be shipped to Dealer to reprogram system. 4. Clearing RV Data in Monitor to restore to Blank condition. a. Monitor can be restore to original Blank condition, without the need for Windows software, or the need to send back to Precision Circuits. 6. PCS Control slows down the Load to Load turn on delay. a. When turning back on loads, wait 5 seconds from one to another load, to assist Generator recovery when heavy loads are turned on. 7. Add one more Service Type 15amps a. Now It will step 30amps -> 20amps -> 15amps ->30 amps 8. Remove Central Monitor Panel blinking LED a. Customers complaining during night 9. Delay Generator Run Signal, so that if Generator is wired to Engine battery, starting RV engine will not cause PCS to lose Gen Run signal. 10.Turning Inverter Off at Magnum Remote, still allows manual override of Inverter- Assist Feature, and Battery Charge Reduction Feature. 11.Allowing Inverter-Assist when in Absorb Charge Mode. Previously Inverter-Assist would only operate in Float Charge Mode. Note: If Low Battery Cut Out threshold reached, then Float Charge Mode is required. |
After I received my upgraded PCS unit, I was able to reinstall it without any trouble. The upgrade fixed the problem I was having with the BMK interfering with the AGS.
I spoke with the owner of Precision Circuits, and he explained that the big difference in pre-upgrade vs post-upgrade is how communication works. The way the unit is shipped from Newmar, the PCS controller talks to the Magnum Inverter, and the remote talks to the PCS unit. The PCS is doing a ‘relay’ of all messages between the two. Works fine, until you do something silly like upgrade or add a component after market. Then it all falls apart because there is too much communication going on.
Post-Upgrade, the PCS is just another device on the bus, and is able to listen to what is going on, and then send requests.
So now when you are on 20 amp service and want to run the microwave, and you are 10 amps short, the pcs will call to the inverter to ‘assist’ as well as override the command from the remote for charger, either doing a setback or shutdown temporarily.
PCS is going to be delivering the new units to all manufactures with this upgrade within the next few months. So earliest you would see this factory installed is mid model year 2014, but most likely it will be a 2015 option.
If you want it now, it only took me 30 minutes to remove and another 30 to reinstall. Shipping cost me $25, and the upgrade was free from PCS.
Overall, this was a bigger project than I expected, but one that I am very pleased with. I firmly believe that every coach should have a BMK, no matter how little you use the battery. This is the only true way to protect your batteries.
***UPDATE 2018-July-04****
I have been using this system for over 5 years now. The original batteries are installed, and they are still working! I keep my coach plugged in all the time when storing, and have kept the SOC set to 70% max usage for my normal habits.
Over the past 5 years, I have manually set it to 50% for the few times that I was boon docking, and dealing with Generator restrictions (ie: National parks). The battery life is absolutely amazing. There is now way these would have lasted as long if I had not installed the BMK.