In my prior post, I discussed the option of custom ordering your Newmar coach. I am going to discuss how I use Adobe Illustrator to customize the prints as an aid in choosing my colors.
Assumptions:
- Adobe Illustrator for Windows. Mac may be slightly different.
- A dealer provided print for your year, model and floorplan
I have provided a sample dealer template for a 2022 Dutch Star
Starting with original pdf named “2022-RB-DSDP-Template.PDF”.
- Open in Illustrator
- From Window menu select “Layers” – it may be already selected. Needs to have a checkmark
- From same windows menu, select “Swatches” so it is check marked.
- Open Layers Tab, and expand graphics
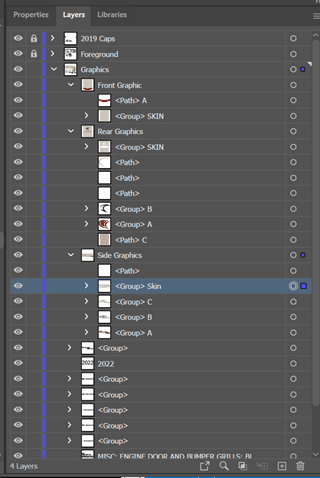
- You will see 3 sections, Front, Rear, Side. Expand Side
- There are 4 groups. Click the “eye” symbol on the left to turn the group on or off, to help identify the group you are on.
- Top group is the skin. Highlight this group as shown in picture above
- In the swatches, you will see that the “eggshell” is highlighted once you have the selection above
- Click on a new color from the list. This will change the color.
- Repeat this for each of the “groups”
- Advanced Selection to make it easier
- After you select the side graphics from step 4, expand out “front Graphic”.
- Press “Ctrl” and click the circle to the right of the group. This adds the front graphic to the side graphic
- Expand Rear Graphic, and again, press CTRL and click the circle to the right of the group for the skin.
- Next You will see 5 groups under the graphics that are not labeled. As you expand them, there will be a sub-group and then a text. Find the one that matches “SKIN:” and add that to the selection using ctrl-click on the circle to right of group

- This will now allow you to change all the colors at the same time.
Repeat this for each of the 4 groups. Before you start another group, go to the menu “select” and choose “Deselect”. This will let you start from scratch.
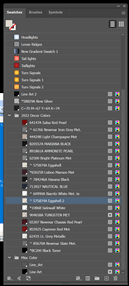
- To add colors, you first need the color code you want to add.
- Open one of the PDFs you found with a color you like in illustrator.
- note: always import range page 1-1 when opening. This is the default
- you may get errors, you can ignore by choosing “OK” or “Close”
- Choose the eyedropper tool by pressing “I” on the keyboard, or clicking this icon on the tool menu

- Go to window and choose color to open the color tool bar
- Now move the eyedropper over the color you want to match. This is best done on the side view image.
- My example was sampling what Newmar calls “64147A SALSA RED PEARL”. I have this view:
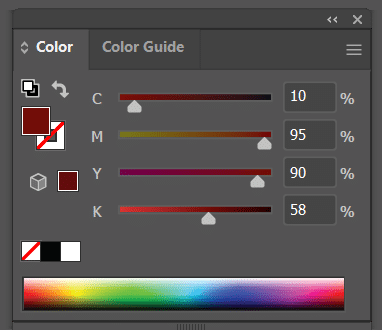
- The 4 % values are what you are after. Make note of these values
- Return to your main document, and go to Color tool as shown in the above image.
- Your color will have changed to another value. Update the 4% values to match what you documented in step 4.
- Drag the color from the square shown below and place it on your swatches group, anywhere you like

- You should end up with a name like shown below, with your different % values and a preview of the color. Double Left click this value and put in the name the way Newmar labeled it.

One thought on “How To choose your Newmar Custom Colors – Part 2”